
# Quick Collaboration
Quick collaboration is a module for initiating, deleting, and handling quick collaboration on project files
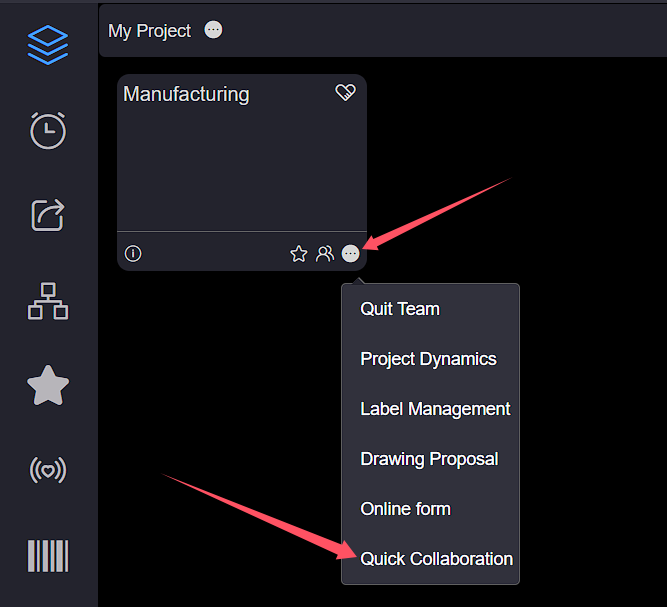
Click on the Project More Operations button, click on the Quick Collaboration button to enter the Quick Collaboration page
# 1.Add
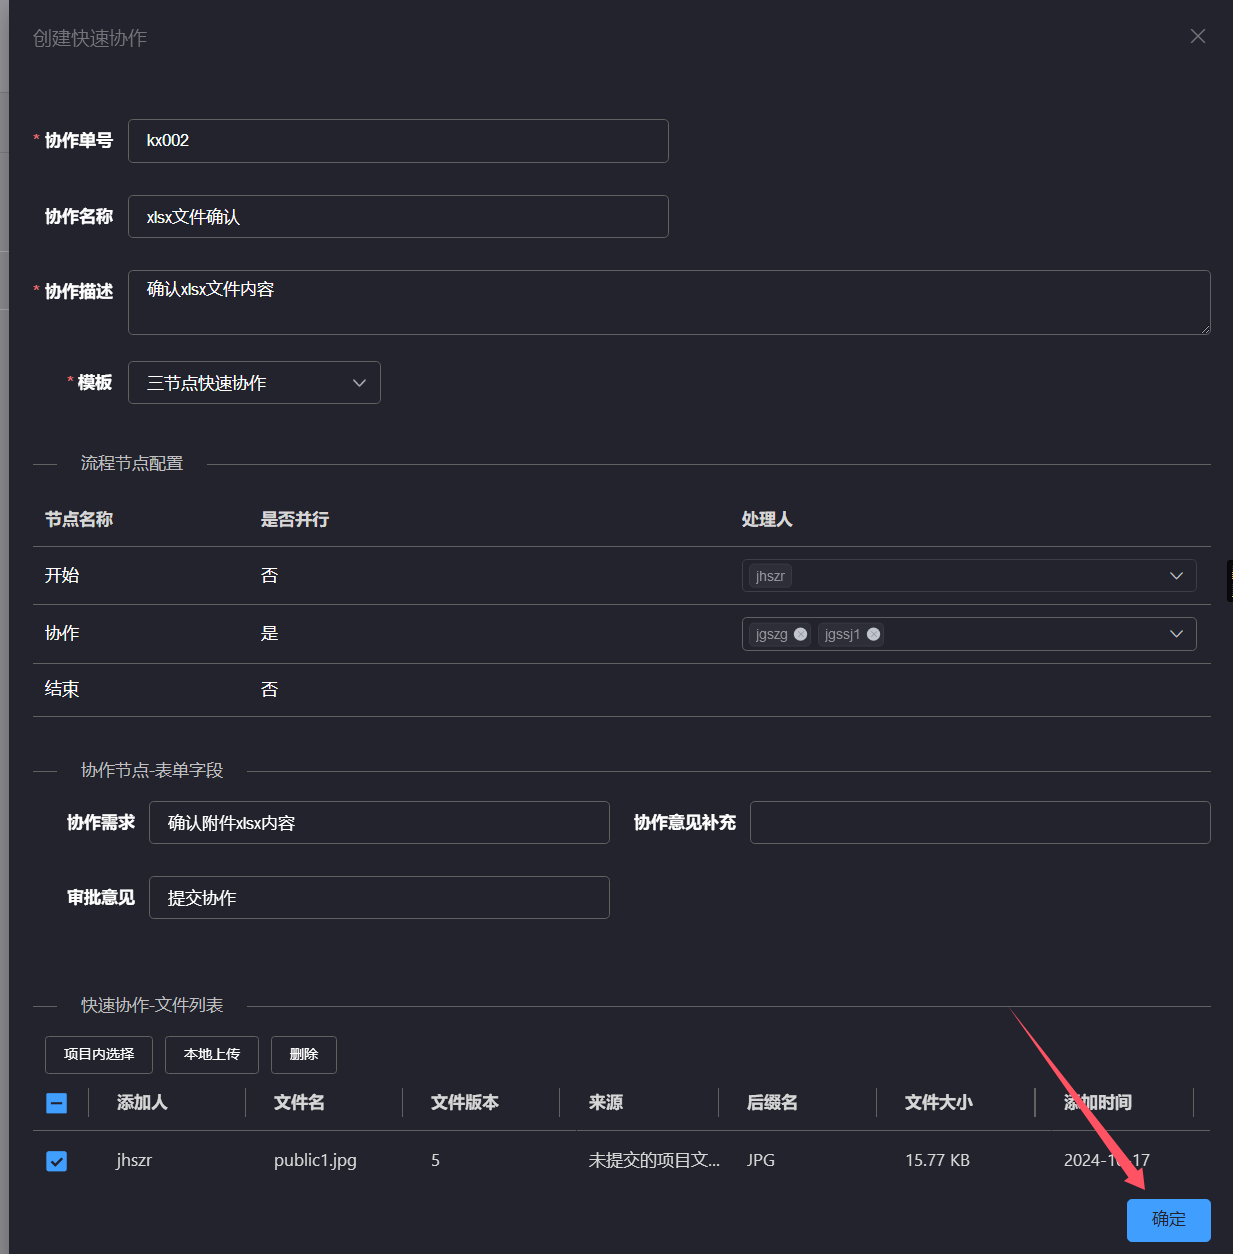
Click the Add button in the upper left corner to bring up the Create Quick Collaboration interface
Collaboration number, collaboration description, and template are required fields 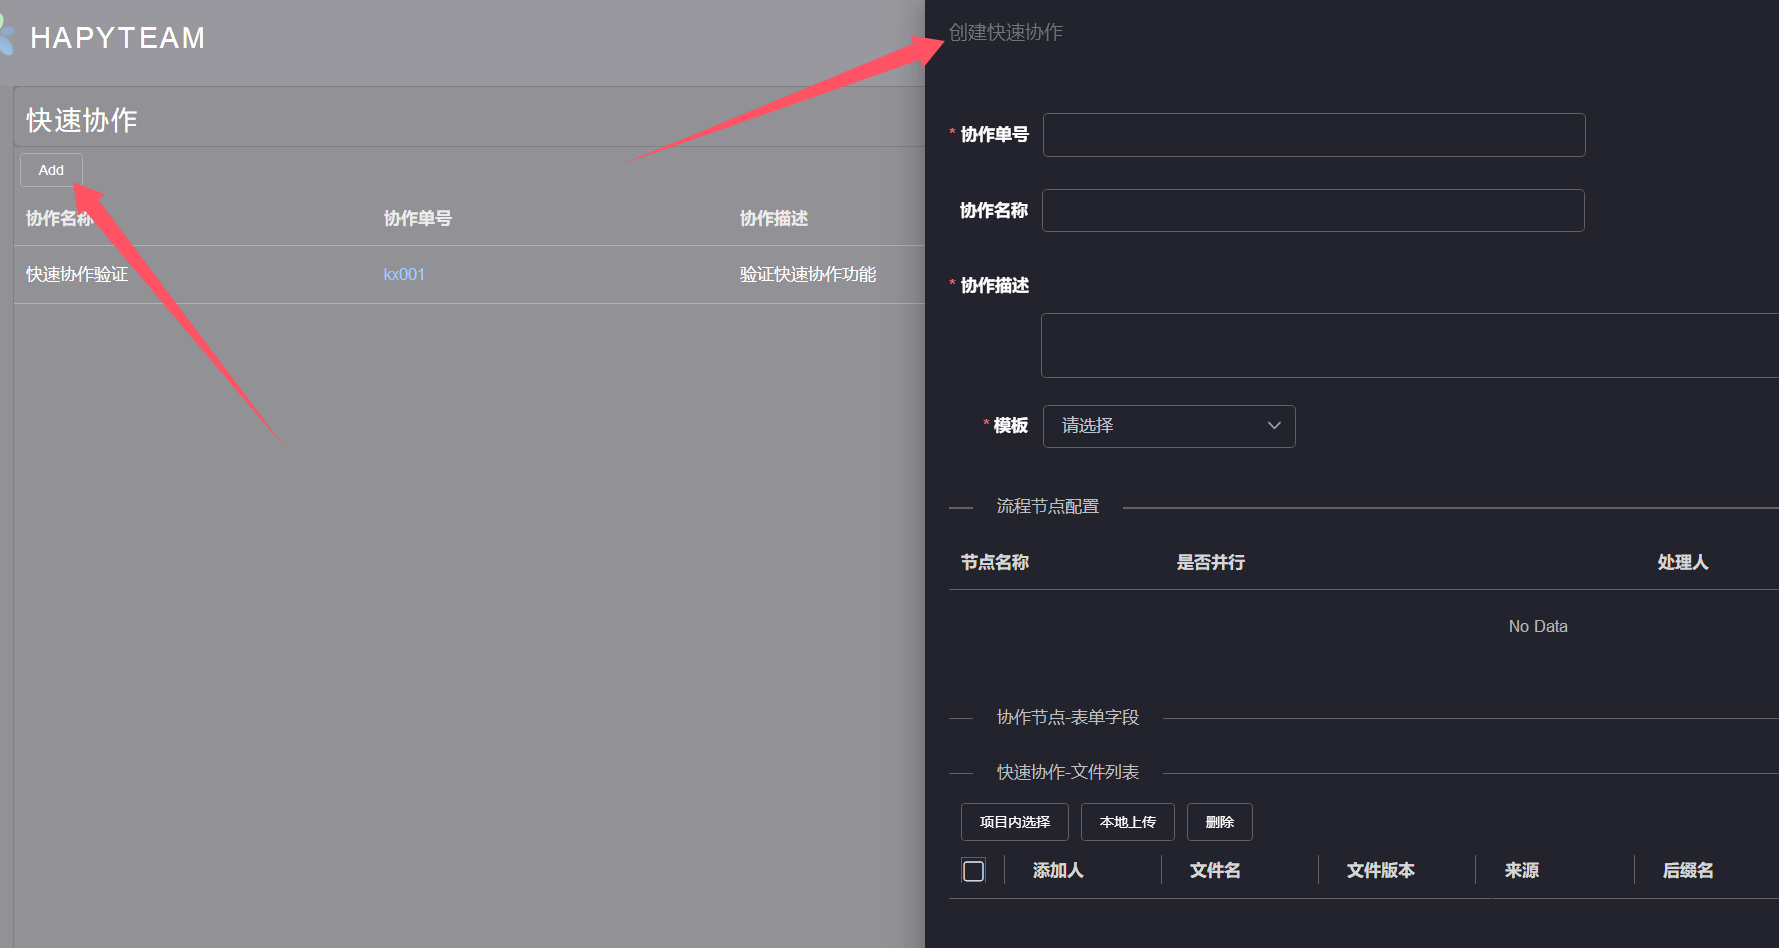
Enter the collaboration order number, collaboration name, and collaboration description, click on the Template list box, select the quick collaboration template to use,
and create the quick collaboration template by referring to Create Quick Collaboration Template 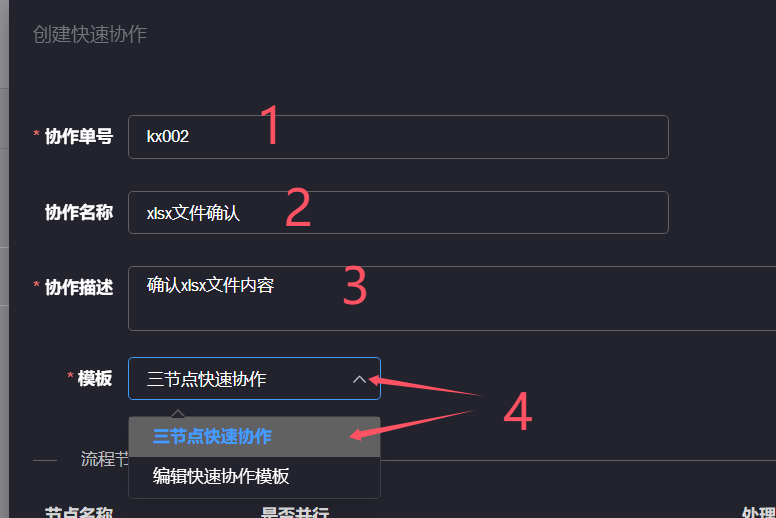
After selecting the quick collaboration template, the process node configuration area will display the nodes of the selected template. Click on the Processor list box on the right side of the node, and then click to select one or more processors
The handlers in the dropdown list are all members of the current project 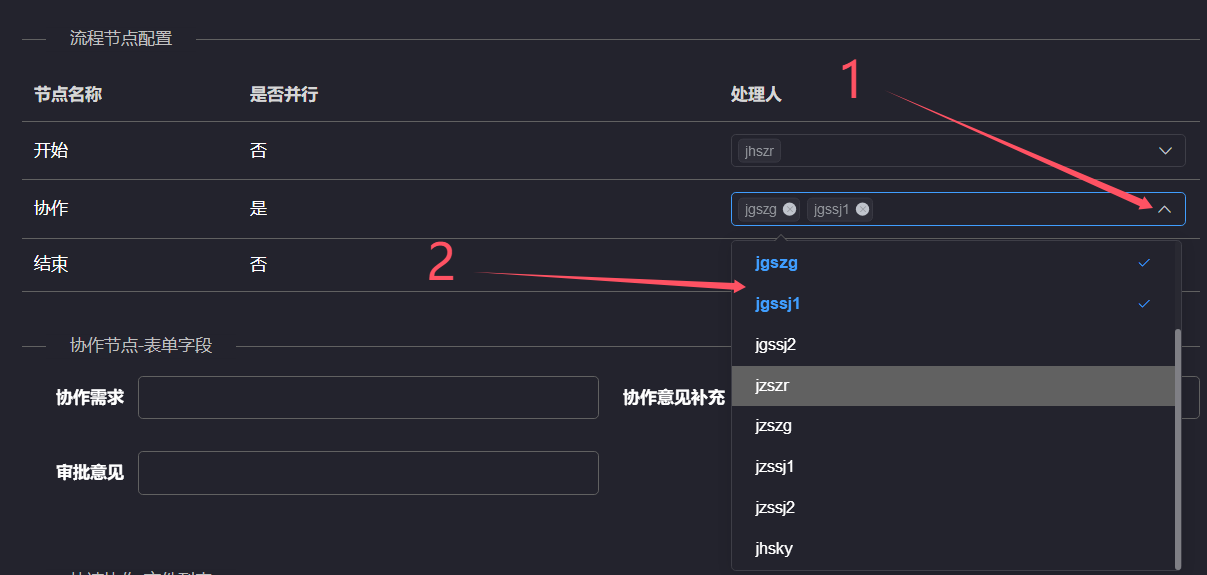
If the quick collaboration template you have selected includes custom form input items, the corresponding custom form input items will be displayed in the collaboration node form field area, and you can enter content in the corresponding input items
Only when configuring custom form input items in the quick collaboration template will the corresponding custom form input items be displayed in the collaboration node form field
area. Otherwise, only collaboration requirement items will be displayed 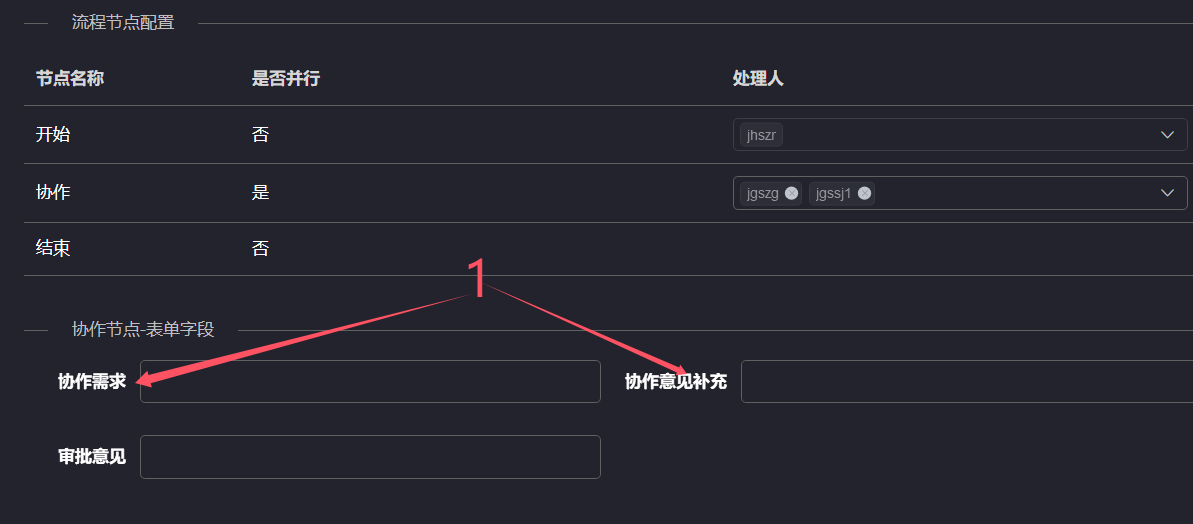
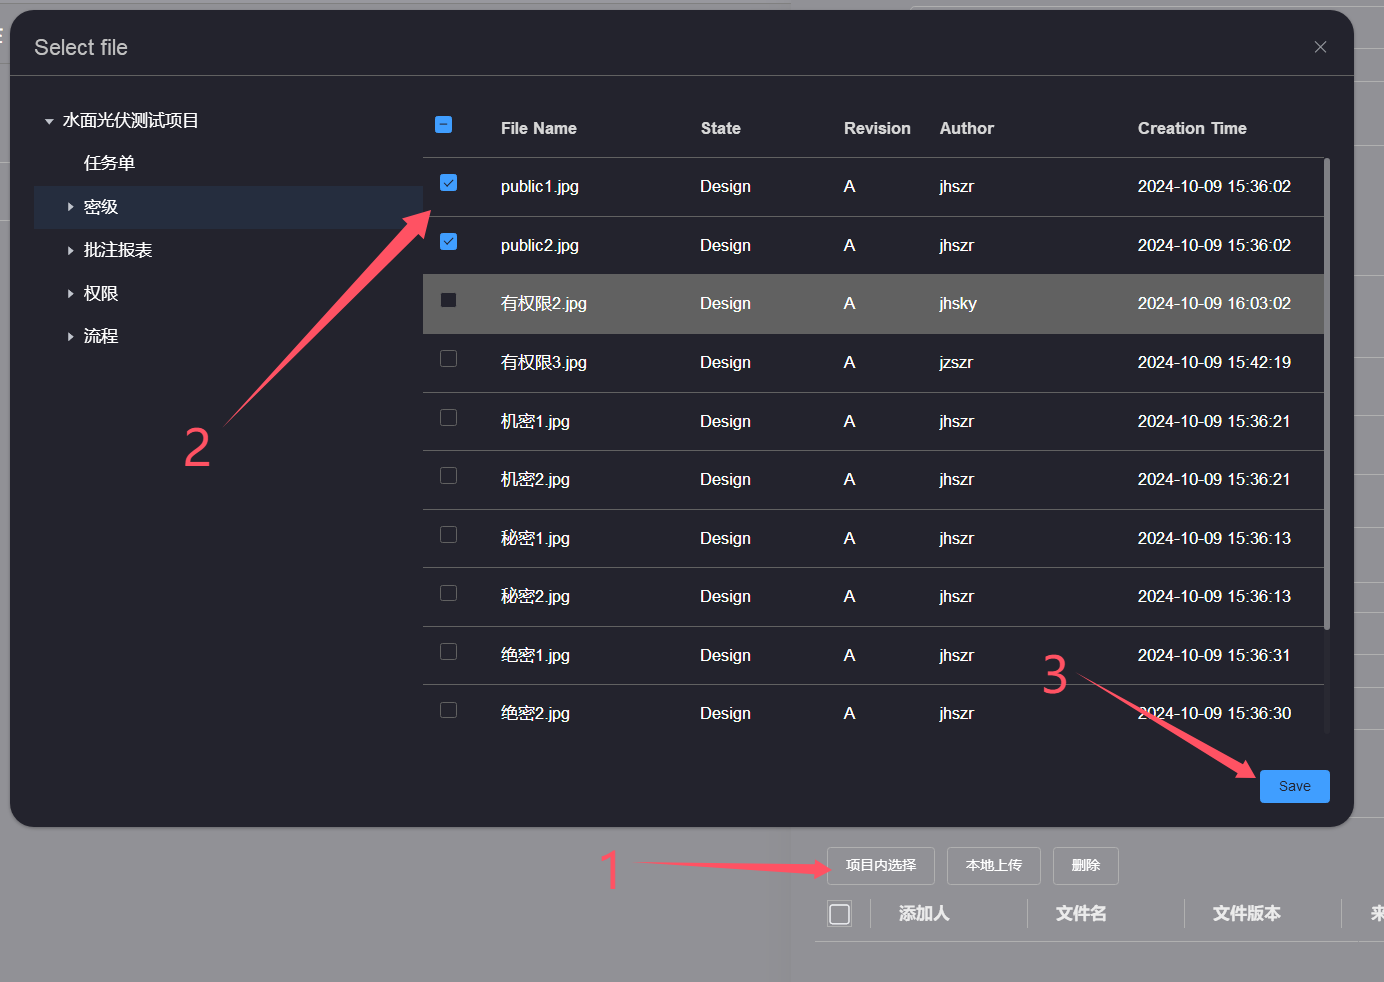
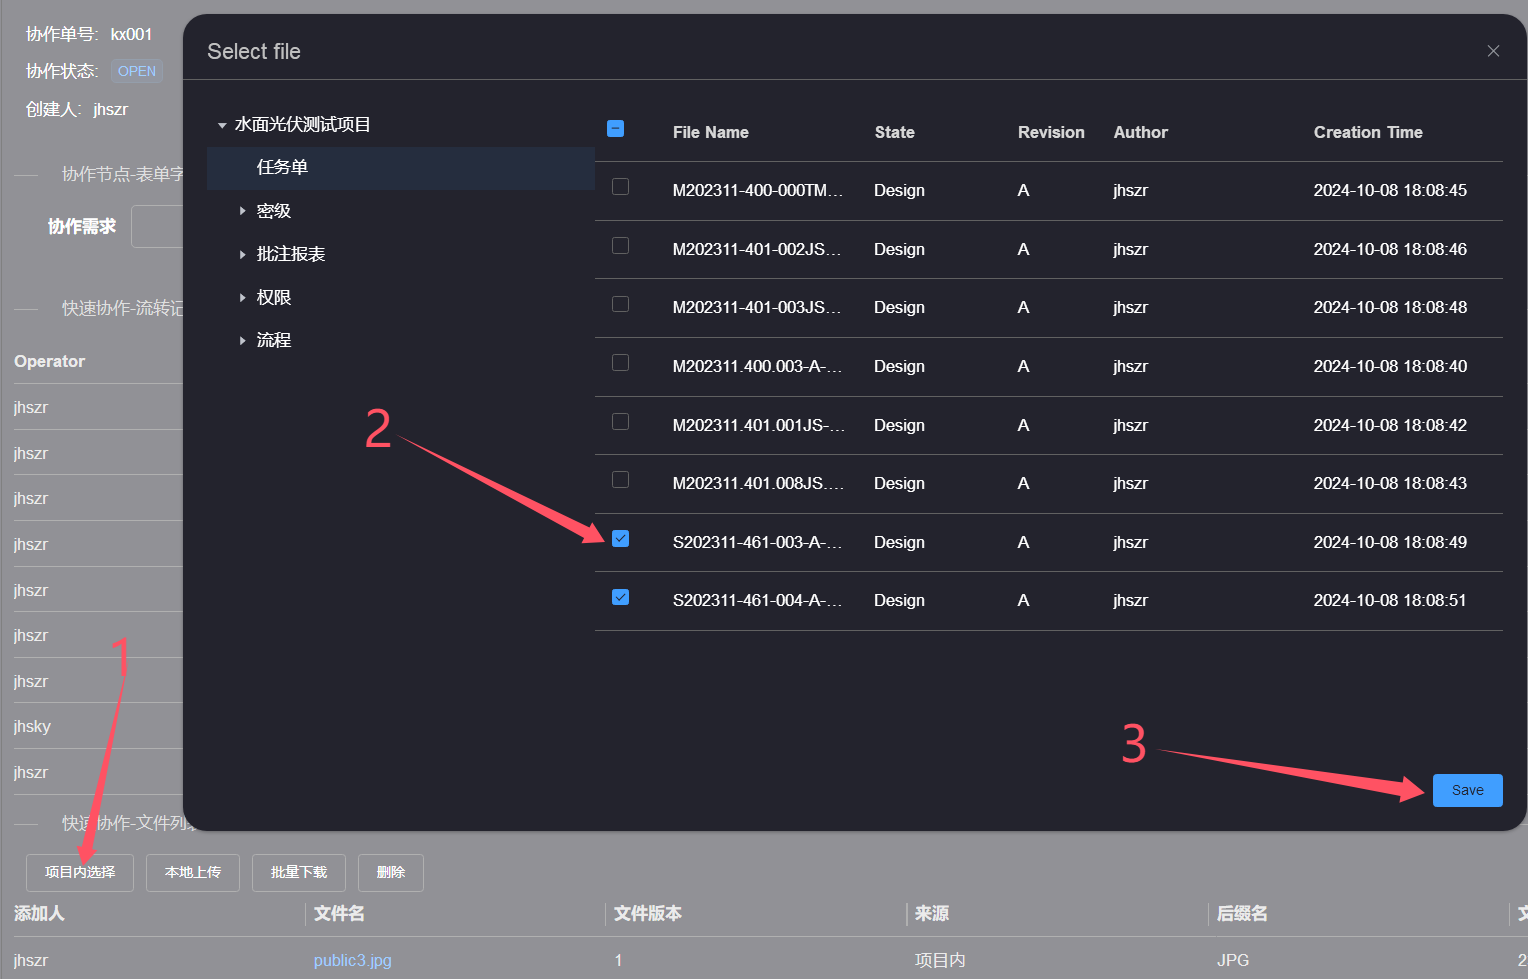
Click the Select button within the project to bring up the file selection interface. Check the files you want to collaborate on and click the Save button to view the
selected files in the Quick Collaboration - File List area
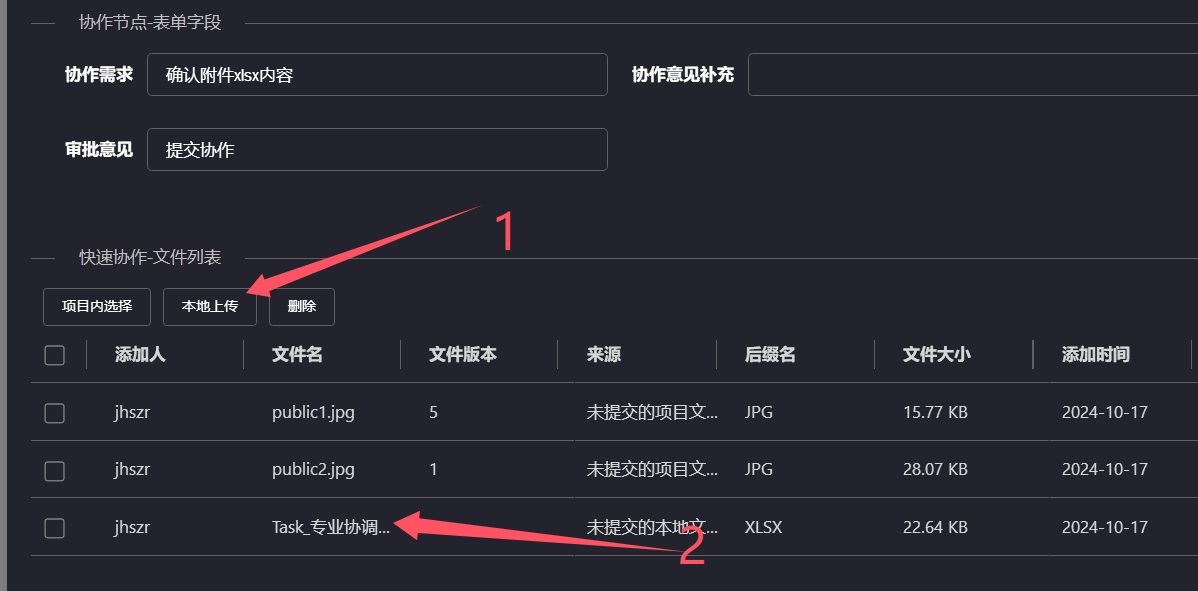
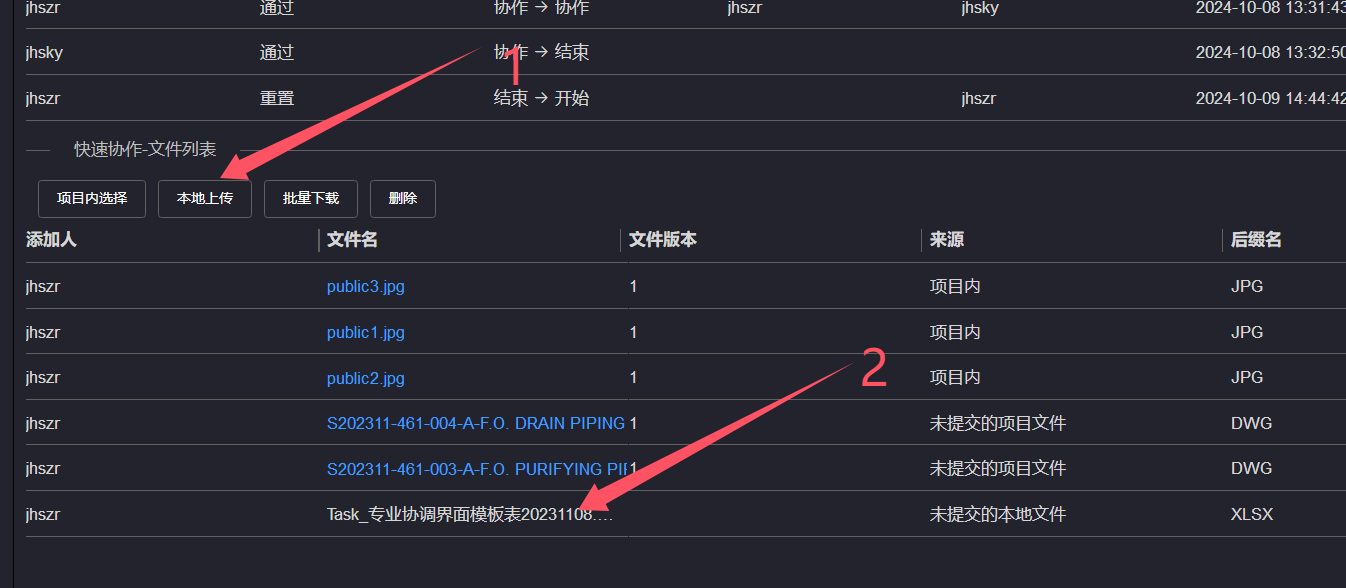
If you need to upload a local file, click the Local Upload button, and a local file selection window will pop up. Select the file and click the Open button to view the
selected file in the Quick Collaboration - File List area
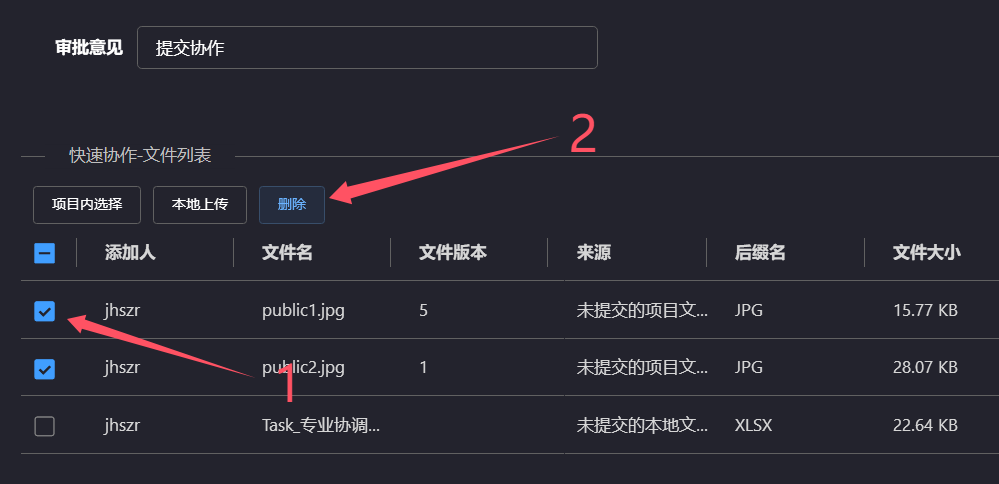
If you need to delete collaboration files, check the checkbox on the left side of the file list, and then click the Delete button above to delete the corresponding files
After configuring all the information, click the Confirm button in the bottom right corner and wait for the operation prompt. After the operation is successful, you can view
the newly added quick collaboration in the quick collaboration list

# 2.Processing
On the Quick Collaboration page, click on the filter options list box in the upper right corner, select the My To Do option, and the Quick Collaboration list will filter and
display the quick collaborations that the current user has to do

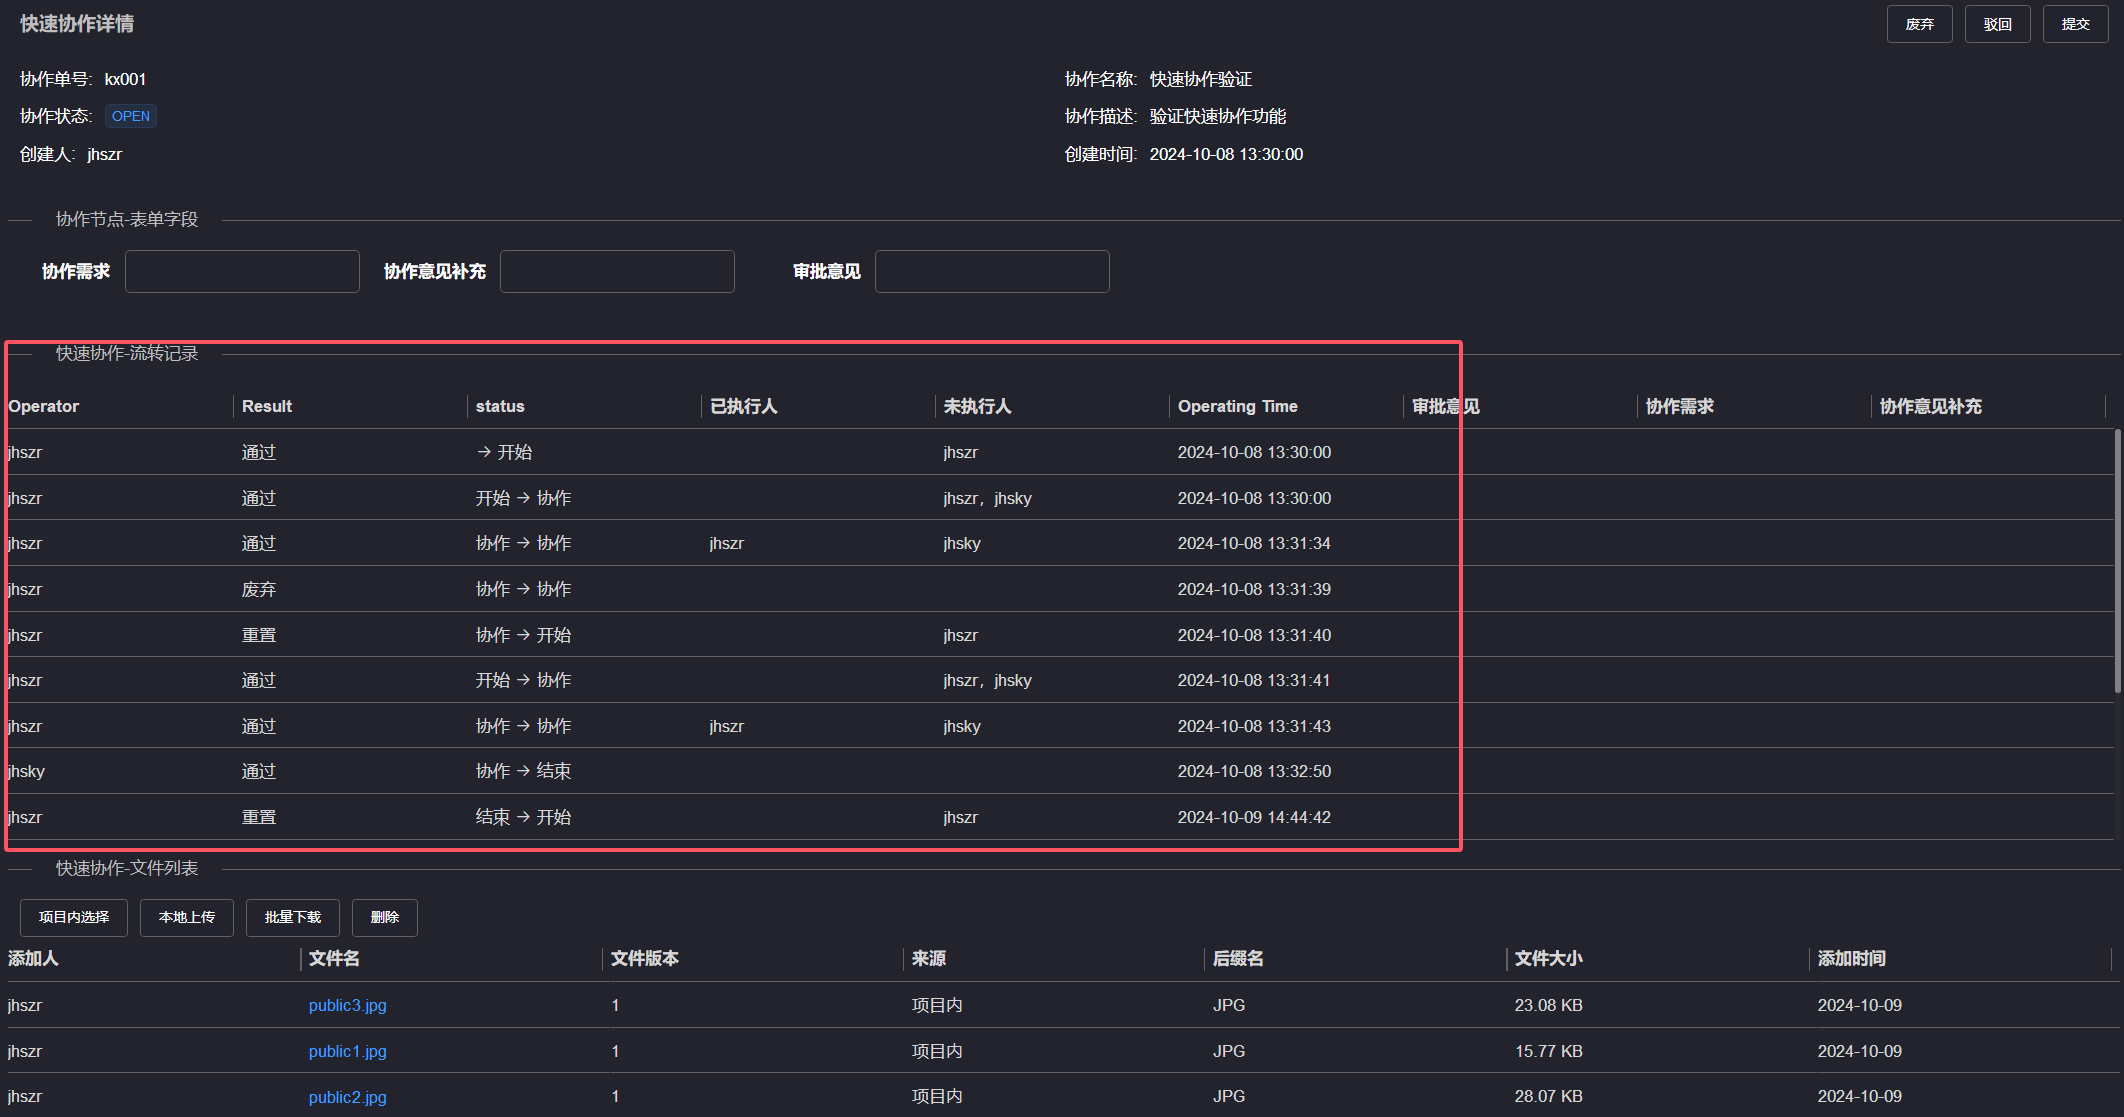
Click the Process button on the left operation bar of the quick collaboration list to proceed to the quick collaboration details page

On the Quick Collaboration details page, you can view the flow records of this Quick Collaboration in the Quick Collaboration - Flow Records area, or process and view collaboration
files in the Quick Collaboration - File List area
Click the Select button within the project to bring up the file selection interface. Check the files you want to collaborate on and click the Save button to view the selected
files in the Quick Collaboration - File List area
If you need to upload a local file, click the Local Upload button, and a local file selection window will pop up. Select the file and click the Open button to view the selected
file in the Quick Collaboration - File List area
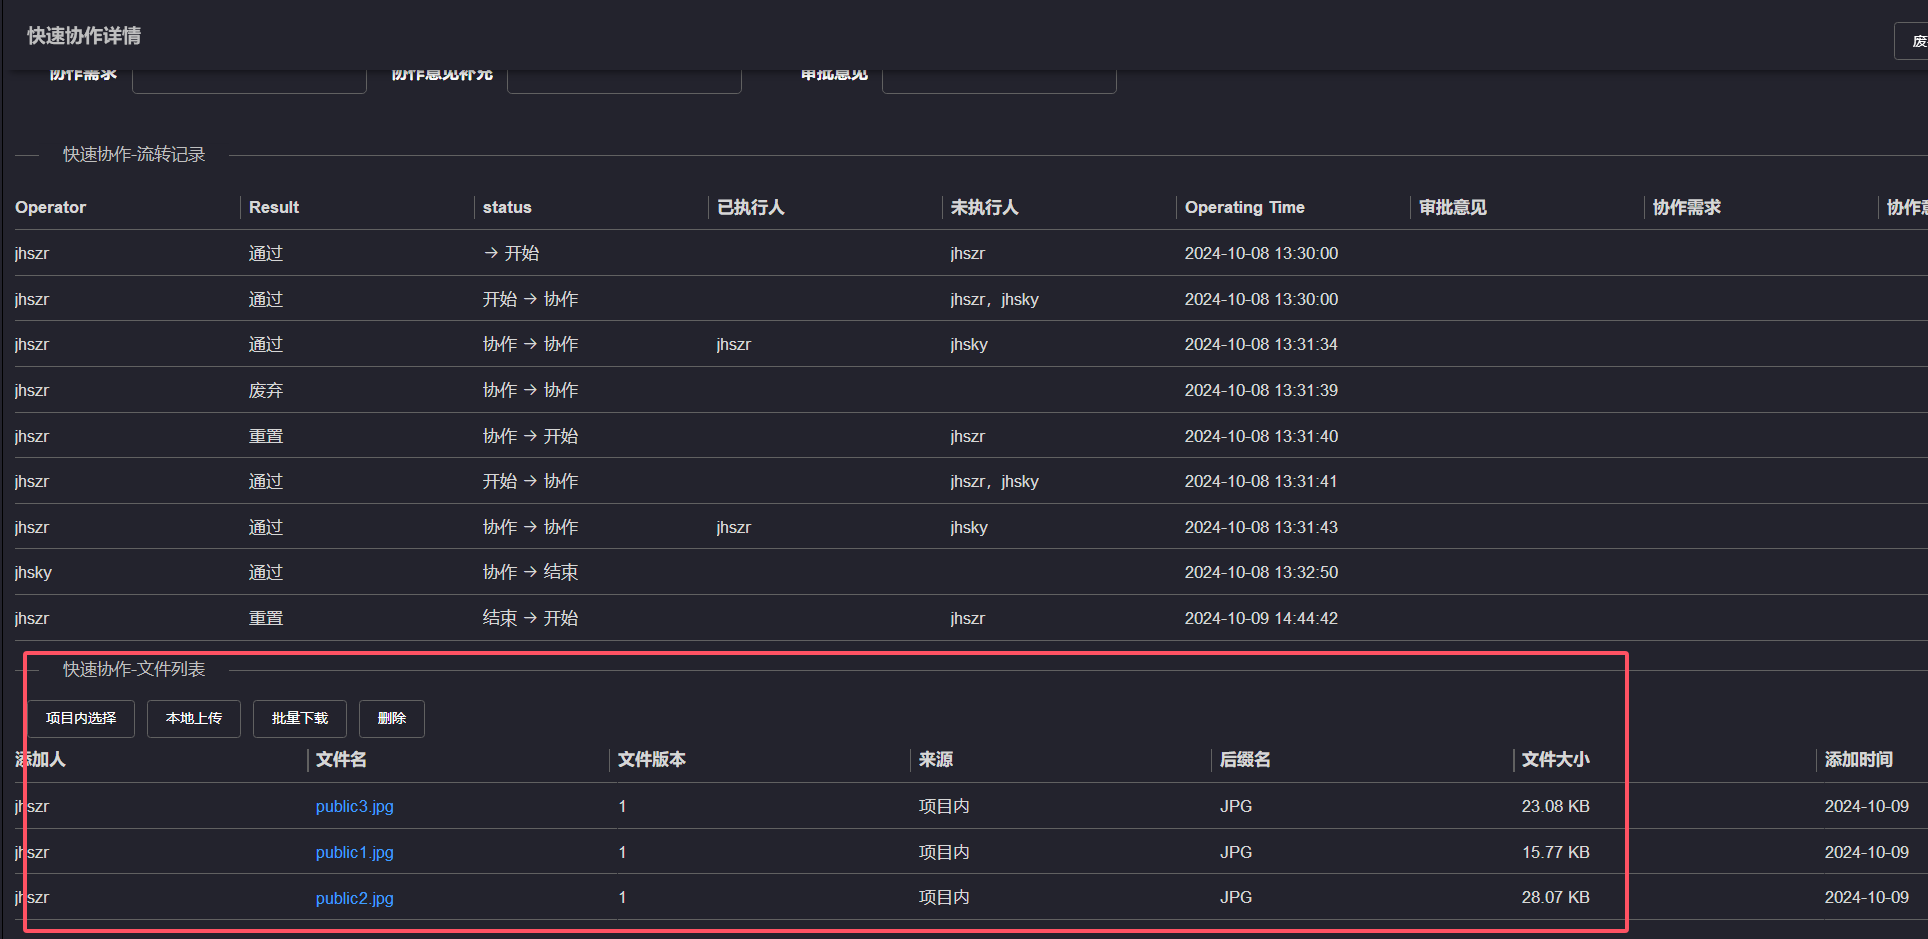
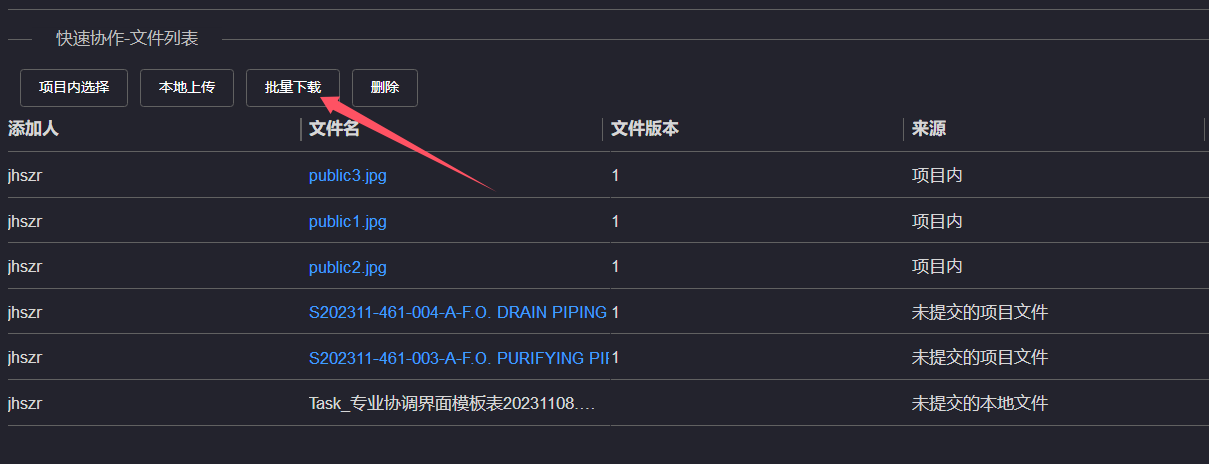
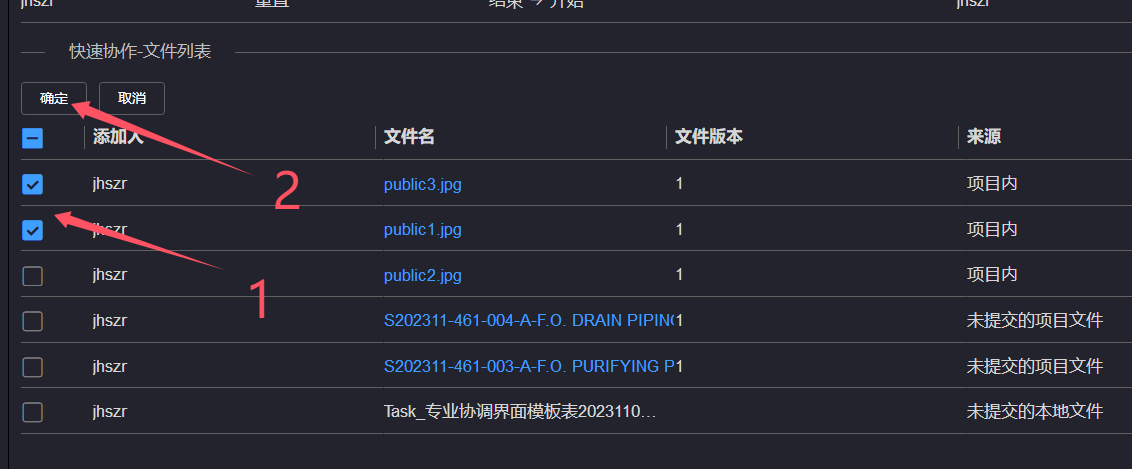
Click the Download button, select the files to download, click the Confirm button, and wait for the selected files to be downloaded
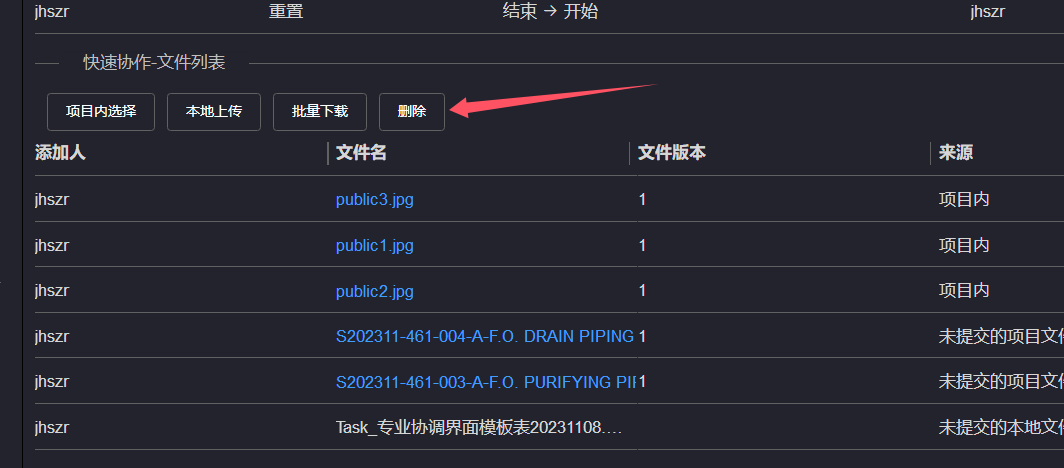
Click the Delete button, select the file to be deleted, click the Confirm button, and the selected file will be deleted from the file list
After entering the processing information in the Collaboration Node - Form Field, click the Discard, Reject, Submit buttons in the upper right corner to process the collaboration task
Click on 'discard', the task will enter the discard state, and after resetting, the task will be at the start node; Quick collaboration creators can perform abandonment operations at any time
Click 'Reject' to return the task to the previous node; Tasks at the starting node cannot be rejected
Click submit, the task will continue to flow to the next node 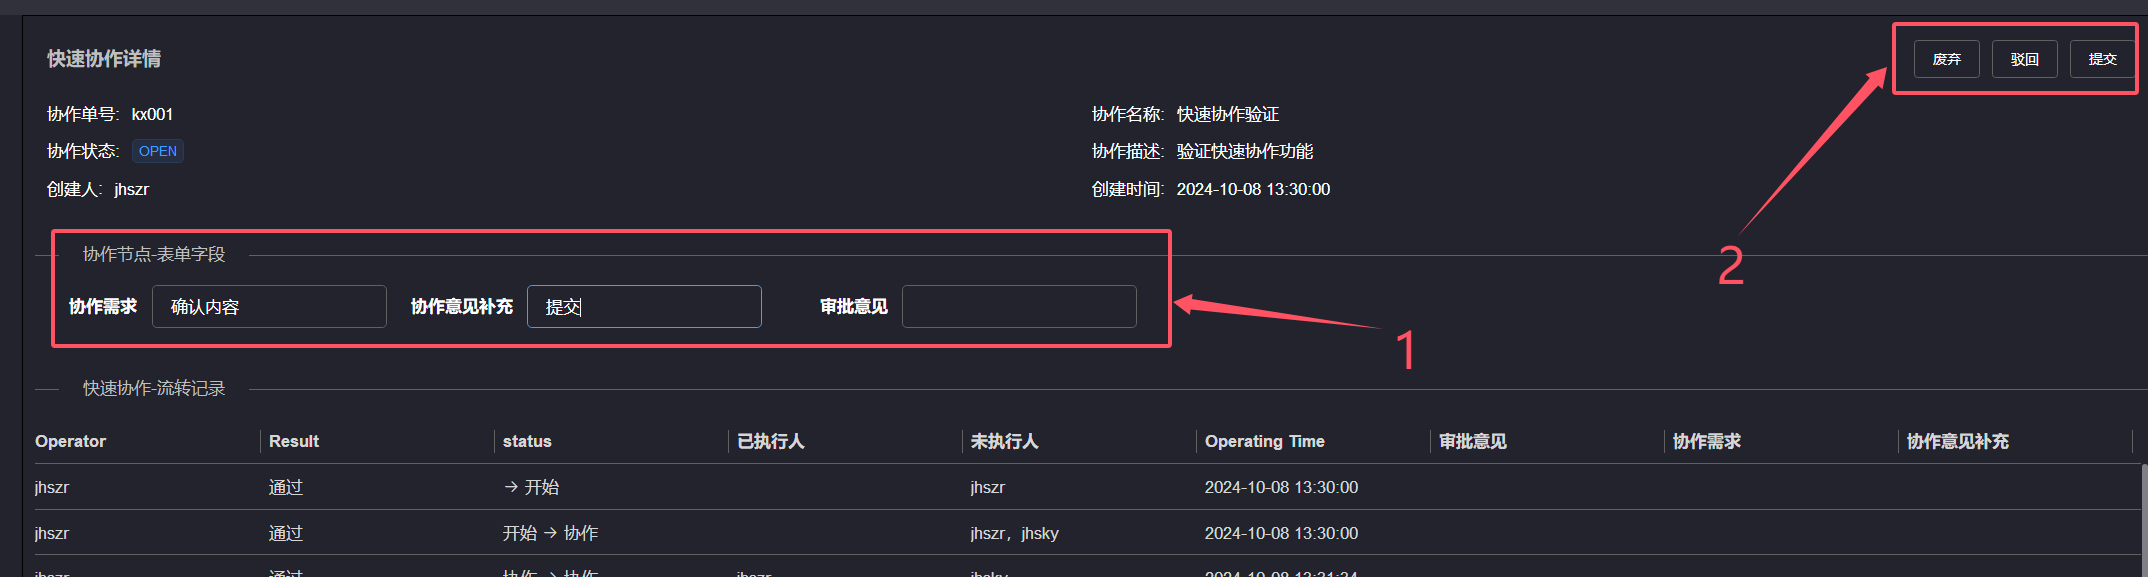
When resetting the fast collaboration from the end node to the start node, you need to first change the fast collaboration status to CLOSED, and then enter the processing page to perform the reset operation. You can refer to Change State
Resetting from the end node to the start node requires manually changing the fast collaboration status to CLOSED first 
# 3.Delete
In the quick collaboration list, click the Delete button in the operation bar on the right side of the quick collaboration you want to delete, and a confirmation dialog box will pop up. Click the Confirm button, and the quick collaboration will be deleted
Only quick collaboration creators can perform deletion operations 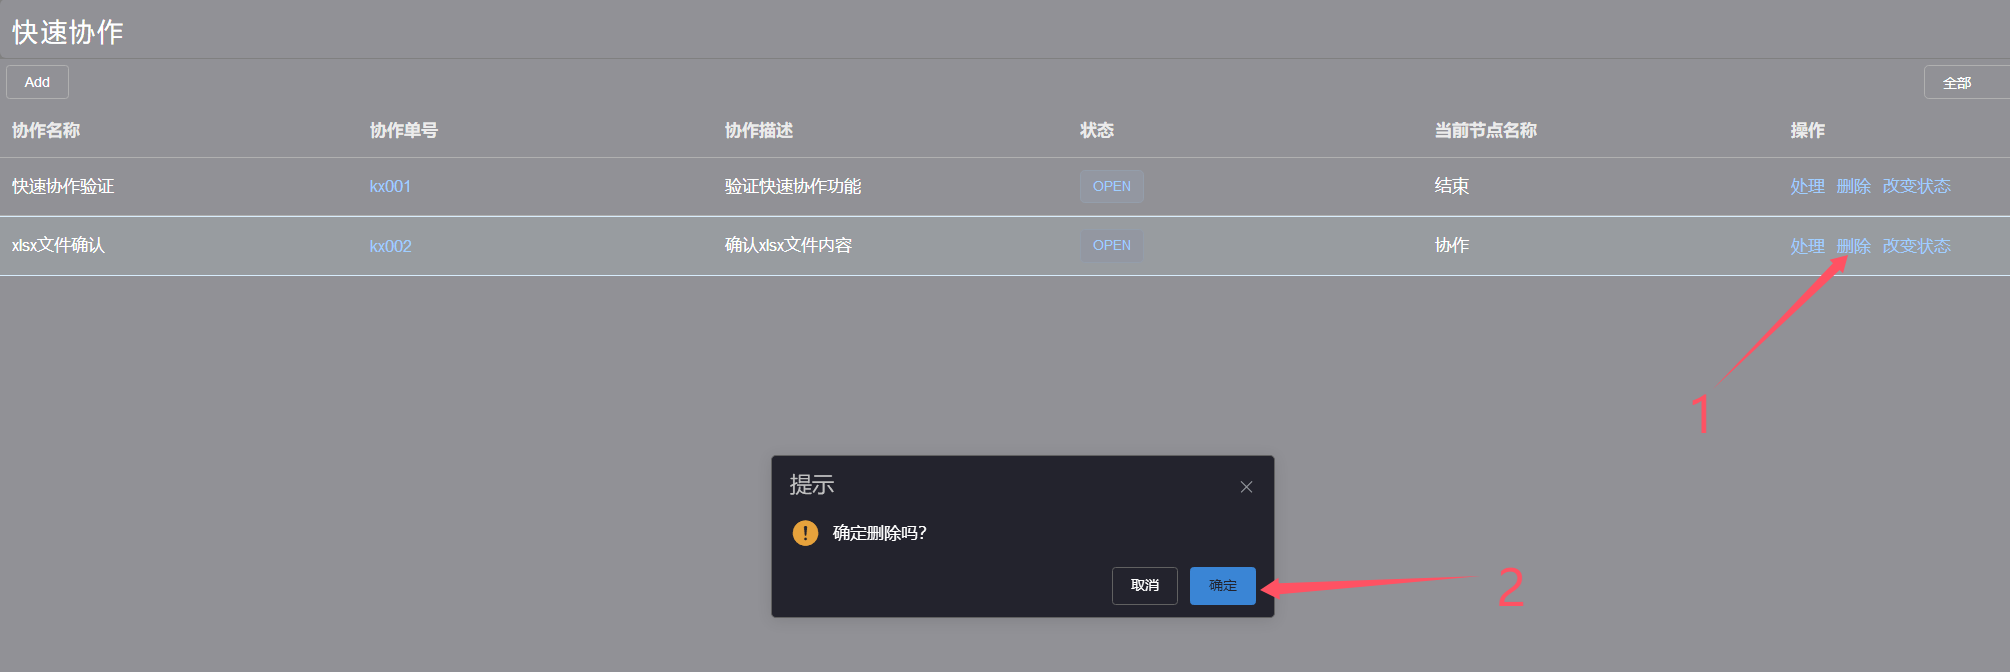
# 4.Change State
When the rapid collaboration flow reaches the End state, click the Change State button in the rapid collaboration list, select the CLOSED option, and the rapid collaboration will be in the CLOSED state
Only quick collaboration creators can perform state change operations 