# HAPYTEAM 3D Creo Getting Started
# 1. Software Download and Installation
From the homepage of hapyteam.com, drag down and select the menu: Technical Support -->Download
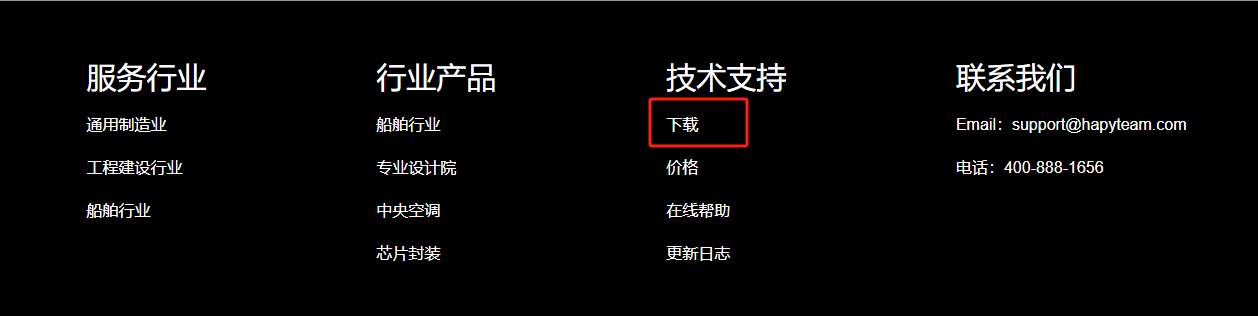
Or directly from https://hapyteam.com/download Find the corresponding Creo plugin and download the latest version.
At present, the plugins for 2D Creo support versions from 4.0 M250 to the latest Creo versions.
If you have any other version requirements, please feel free to contact us at any time.
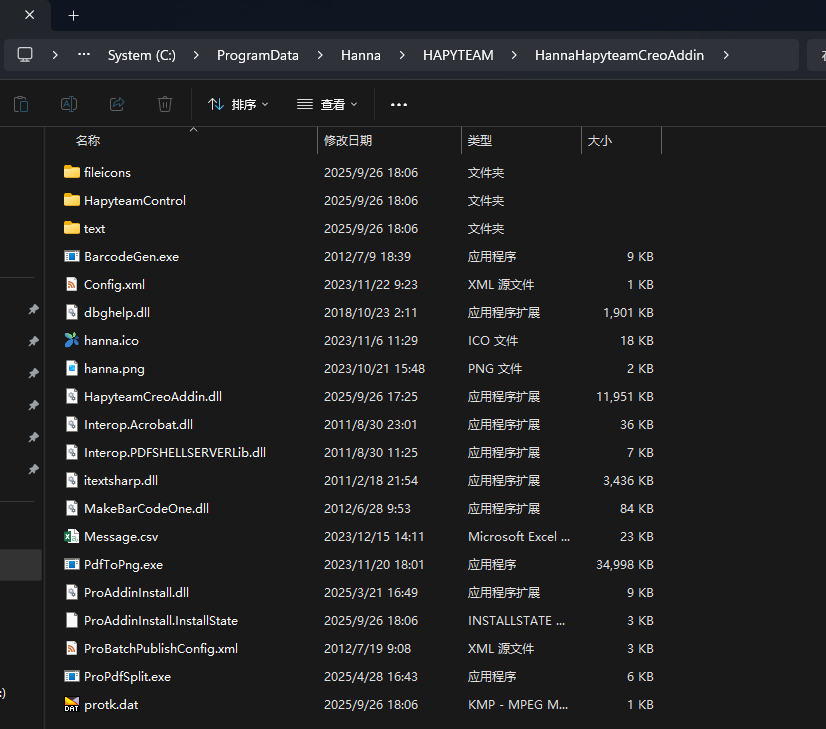
After downloading, install directly. The installation program will be installed directly to the C:\ProgramData\Hanna\HAPYTEAM
directory. The screenshot of the installation location of the relevant software is as follows:
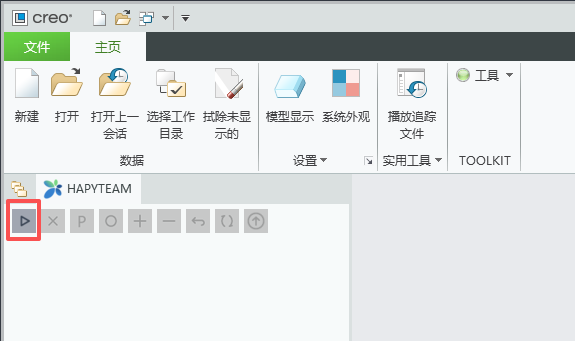
After installation, start Creo and you will see the following menu and HAPYTEAM project manager. When opening the relevant Creo file,
users can switch between the Model Count and HAPYTEAM tabs.

# 2.Login
Log in by clicking the "Login" button through the menu or switching to the HAPYTEAM tab.
The program will pop up the following dialog box
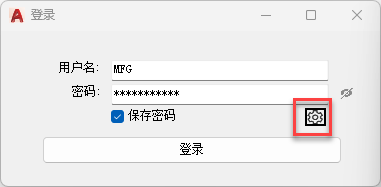
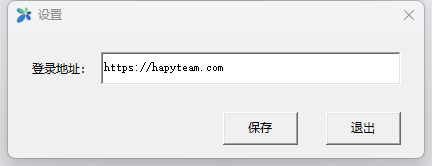
Enter your username and password, and the program will automatically log in to the HAPYTEAM server. If it is a private deployment,
click the settings button in the bottom right corner of the above picture, and enter the IP address of the company's server, such
as 192.168.1.8, etc.
After logging in, the program will automatically switch to the project that was worked on during the previous login.
Users can choose the "P" button to switch projects
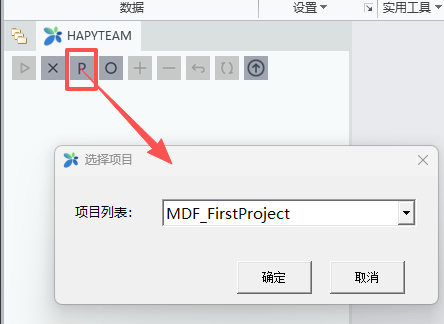
Then you can directly open the project files from the server or local working directory.
Explanation:
- If the user has multiple projects, they can switch between them from the drop-down selection box
# 3.Understand the working directory
The underlying layer of HAPYTEAM uses the object-oriented storage system MinIO for file storage. All files are stored in a fragmented manner. There is no concept of folders or directories. So, by setting the working directory for each project, it automatically maps to the local working directory.
For personal projects, the creator is the project administrator. For enterprise projects, enterprise administrators need to create
projects and designate project administrators.

In the above figure, the project name is Manufacturing and the working directory is D:\HAPYTEAM. Therefore, all local files of
all users in this project correspond to D:\HAPYTEAM\Manufacturing。
If the project manager has already created the corresponding directory on the server, the program will automatically check if there
is D:\HAPYTEAM\Manufacturing\001-DWGFiles locally through the right-click menu on the file or directory, such as the right-click
menu on 001-DWGFiles in the project directory, and switch to the directory automatically. If the directory already exists, open Windows
Explorer directly and switch to the directory automatically. If the directory does not exist locally, the program will automatically
create it. This feature can automatically create directories that exist on the server but are not locally available to avoid manual
creation and input errors. See the figure below.

# 4.Project icon
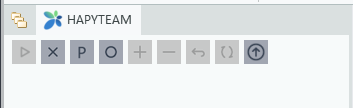
In the above icons, from left to right, they are: Open HAPYTEAM login, logout, switch projects, open from server, check in, check out,
undo check out, refresh, and software update
- login
User login to HAPYTEAM server - logout
User logs out of the server - Switch project
If the user has multiple HAPYTEAM projects, they can switch projects - Open from server
Open the latest version from the Hapyteam server, and the plugin will automatically generate a related structure tree based on the file associations at check-in - Check in and detection
Check in Creo related files to or from the server. - Undo Checkout
Revoke checkout of files - Refresh project
Refresh the latest status of project files
# 5.Check in and check out files
Each file in Creo Manager has a file status. This file status is a combination of server and local files. The list of file status icons is as follows
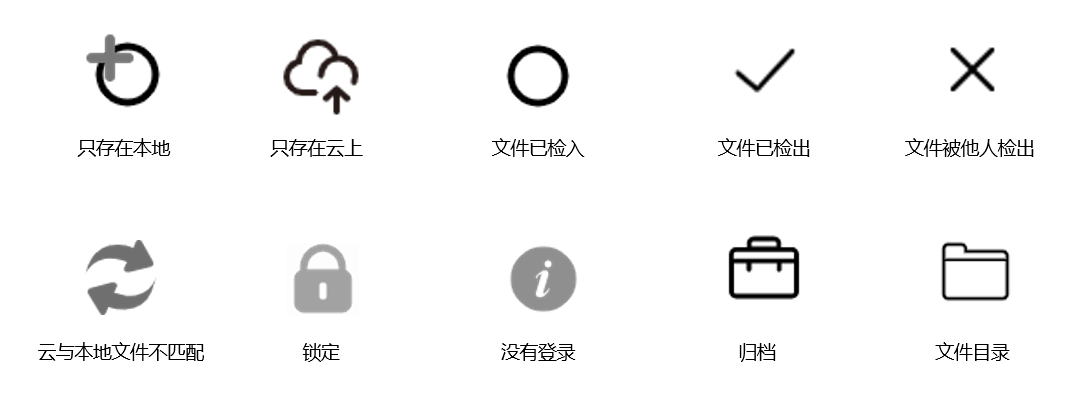
The status of the file is explained as follows:
The above status indicates that none of these three files have been checked into the server

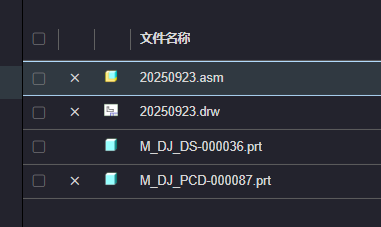
The above indicates that these three files have been checked out by the current account. For other users, the status of these three users
changes from "checked" to "X", indicating that they have been detected by others. See screenshot of the server file in webpage status as
shown in the following figure:
# 5.1 Check in files
File check-in is the process of checking local files into the server. At this time, the latest local files are uploaded to the server, and the local files will automatically be changed to read-only status.
There are two states: never checked in and rechecked files checked out from the server. Files checked out by others can only be viewed by users from the previous version and cannot be checked out or checked in.
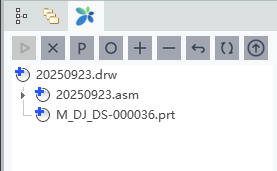
When checking in Creo files, the program will automatically determine whether the file has external reference files. If there are, the file will be automatically added to the check in list for users to check in together.
As shown in the screenshot above, the DRW file is associated with one assembly and two parts. For any check in and check out operations on this engineering drawing, the system will check the status of these associated files for users to choose whether to check in or check out.
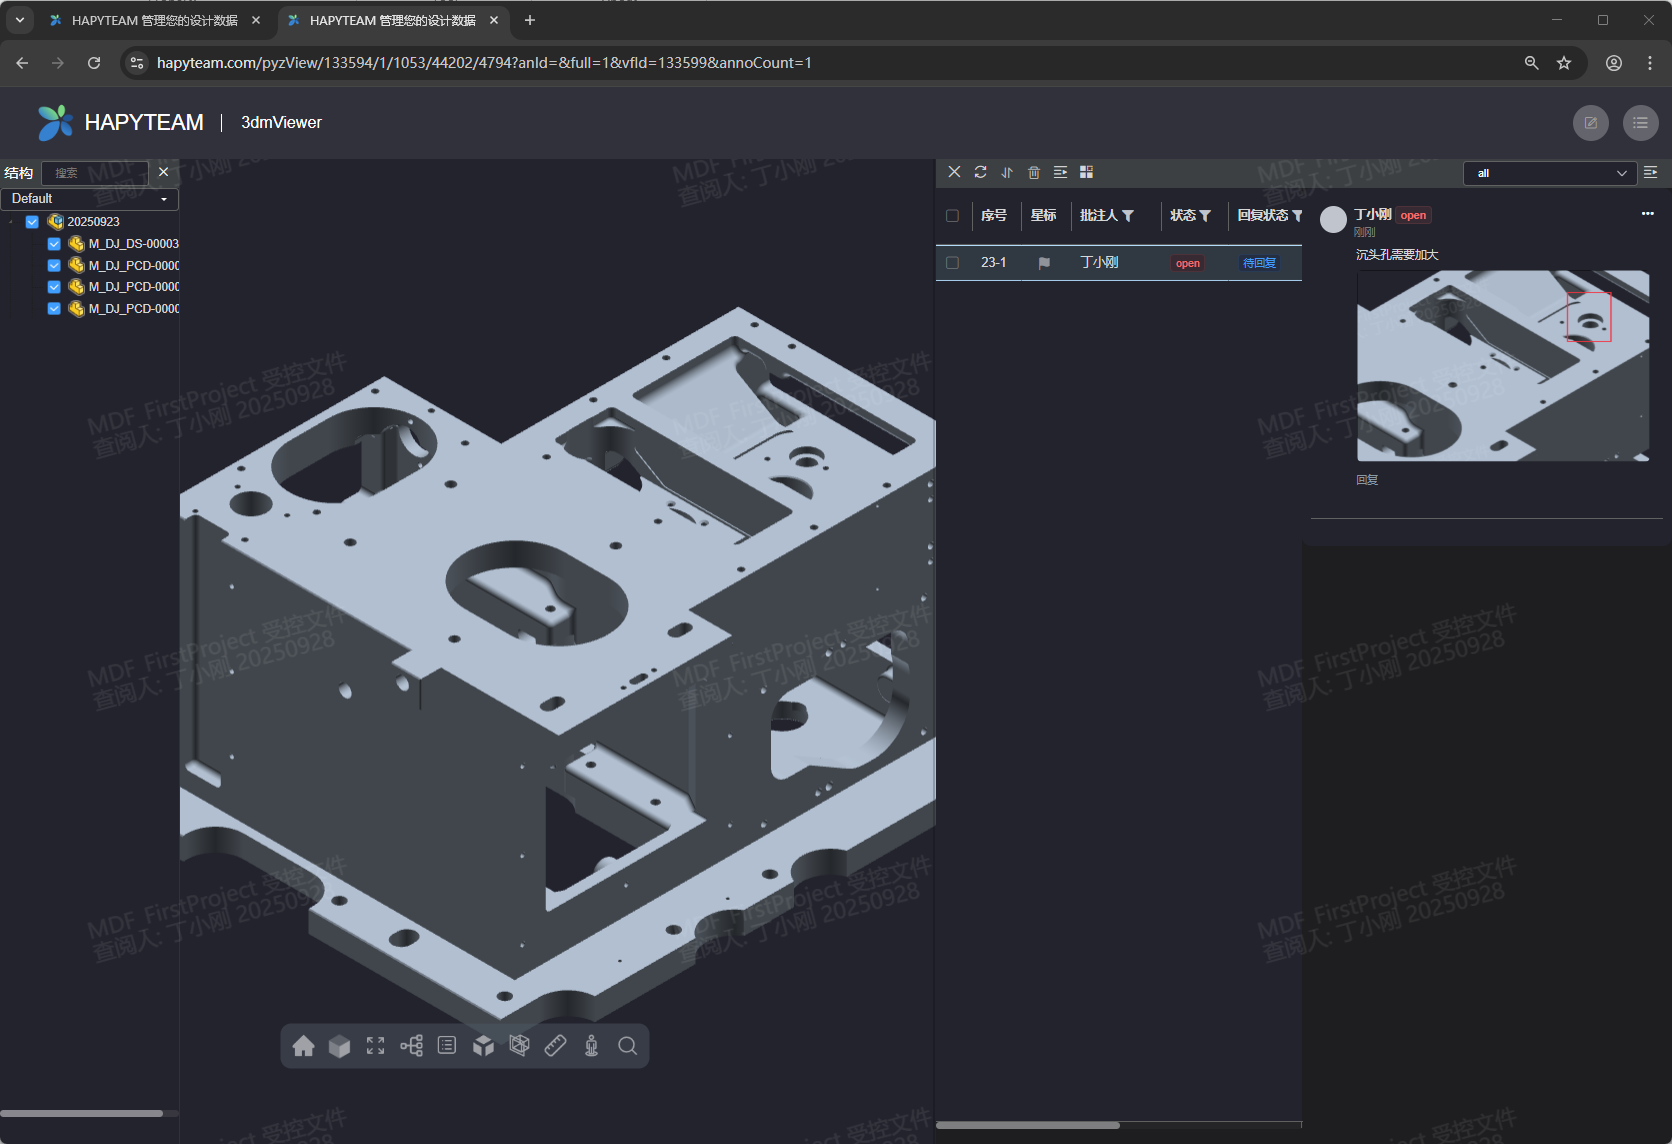
On the check-in interface, if the "Create Browse File" option is selected, online browsing or circular annotation can be achieved on the web
page after check-in.

The online browsing interface on the web page is shown in the following figure

You can add circle comments or reply to related circle comments in the upper right corner.
# 5.2 Check out files
Only files that have not been checked out by others on the server and the user has editing permissions can be checked out by the user.
The process of checking out is actually downloading the latest version of the file from the server, changing the status of the file on the server to checked out, and removing the read-only attribute of the local file, making it easier for users to open and edit.
Similarly, the associated files will also be listed in the checkout dialog box, making it easier for users to check them out together.
# 6.HAPYTEAM CREO Efficiency Tool
# 6.1 Attribute related functions
Attribute export
Export the attribute table of the file as a template for the "attribute import" function later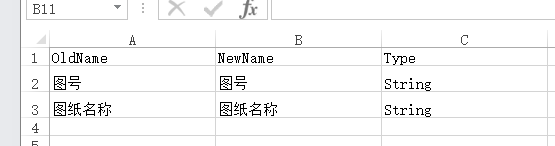
If a user wants to maintain a certain attribute value but also wants to modify the attribute name, they can write the new attribute name in the NewName column.Attribute import Use the Excel template exported from the previous attribute to modify or add the desired attribute. The newly added attributes only need to be cleared in NewName. In general, Type is a string.
After editing the Excel spreadsheet and importing the opened drawing or assembly, the program will automatically unify the custom properties of all files associated with the file.
Attribute Table
Classify and export the relevant attributes of files with defined attributes as management templates for the enterprise, and import them into HAPYTEAM's enterprise custom attributes.
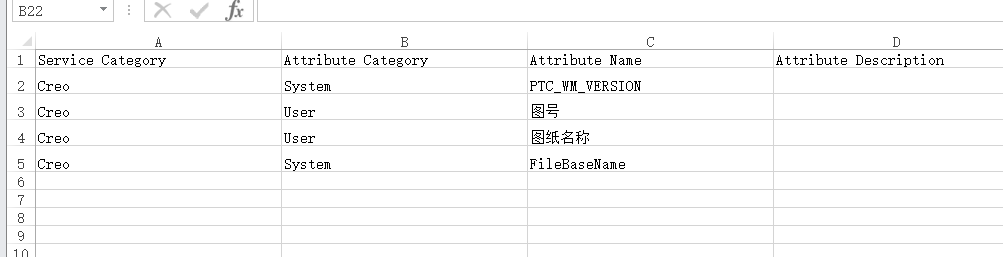
How to import attribute sheets into HAPYTEAM enterprise custom attributes?
Enterprise administrators can log in to HAPYTEAM, go to Settings - Properties - Add Custom Attributes, select the custom attribute name, and then "Import Attributes" below.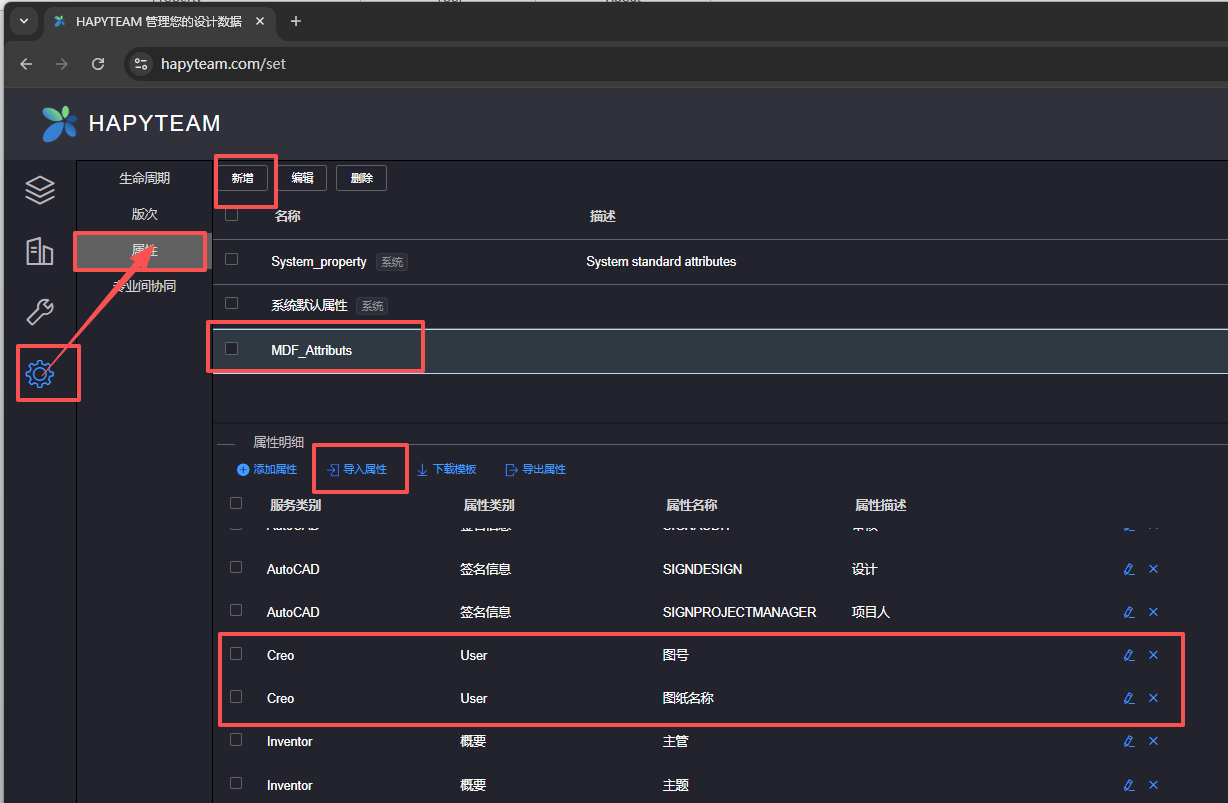
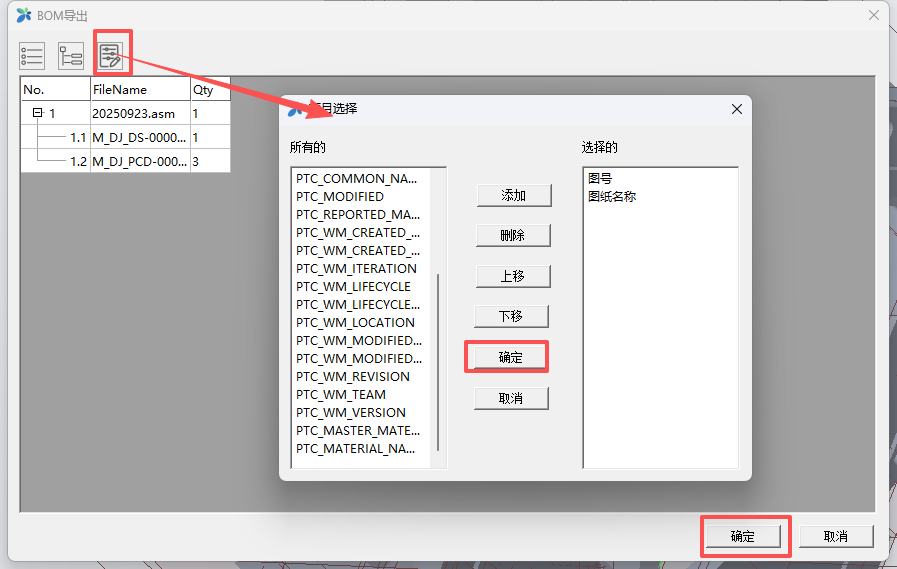
When users check in files from Creo in the future, if the file corresponds to a certain attribute, the attribute value will be automatically checked into HAPYTEAM. Users can open the attribute tab at the far right of the file list to see the attributes in these files.BOM export BOM export and import functions help users to batch modify CREO file properties through Excel spreadsheets. On the interface, it is possible to define which attributes need to be exported and modified. This setting only needs to be set once, saved to the personal configuration directory, and will continue to be used or modified again in the future.
BOM import
Modify the BOM exported table and import it again to update the CREO file attribute values.ERP Code
Rename
After setting the relevant attributes, users can use this function to batch rename a drawing or assembly related file according to the renaming rules, while maintaining the association and structural relationship of the new file. Attention: In order to protect users' existing assets, the generated raw data will be renamed in batches and placed in a directory named after the date in the same level directory.
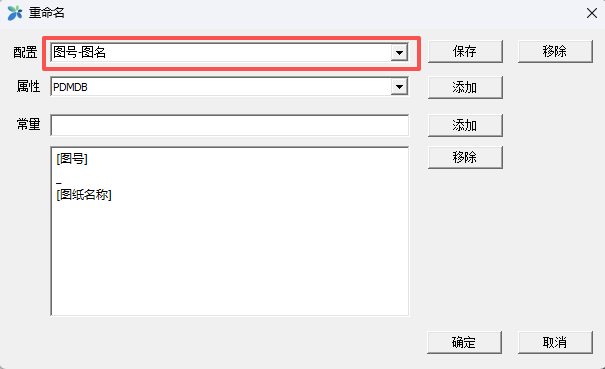
In the naming convention, users can choose attribute names or add constants with equal spacing, and save them for reuse.
# 6.2 Related functions such as drawing output
Batch production of images
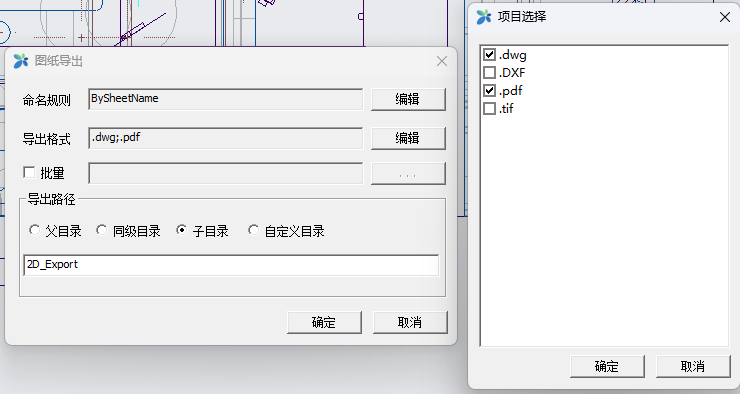
Batch convert engineering drawings to DWG, PDF, or TIFF formats.
Naming conventions for output files
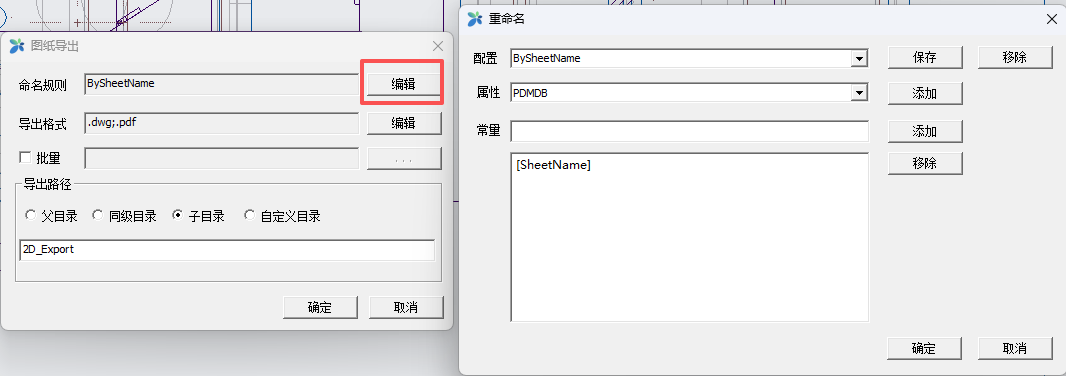
Output format selection:
Users can choose whether to output in bulk or only export the current drawing.
For a file with multiple SHEETs, the file name output by each SHEET can be controlled separately. For example, in BySheet, you can choose the sheet name, so that the output PDF or DWG will be renamed with the sheet name.
The output directory can also be controlled to a custom directory. The first three directories are associated directories. The last 'custom directory' is grouped under the same directory.Batch printing
Clean up version
Remove version number
This feature allows CREO to save files only as replacements, without saving multiple versions in the same directory
# 6.3 synchronous copy
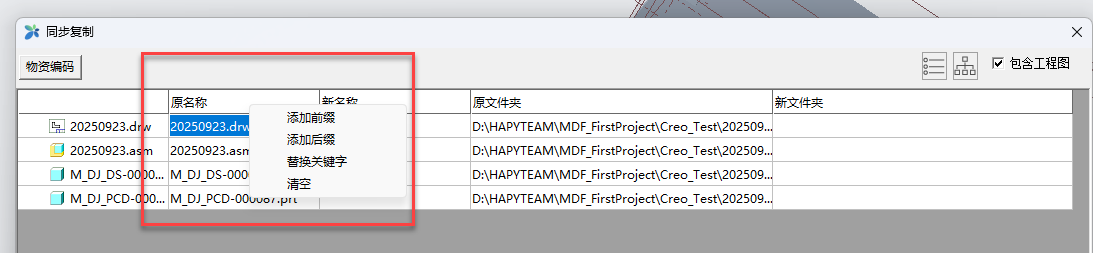
The synchronous copying function allows users to quickly transform an existing product into a new one.
Due to the interdependence of assembly, engineering drawings, and parts in 3D software. If you simply modify the file name, the model or drawing will lose its association.
By using the synchronous replication function, it is possible to quickly change an existing product to a new one and maintain this association relationship.
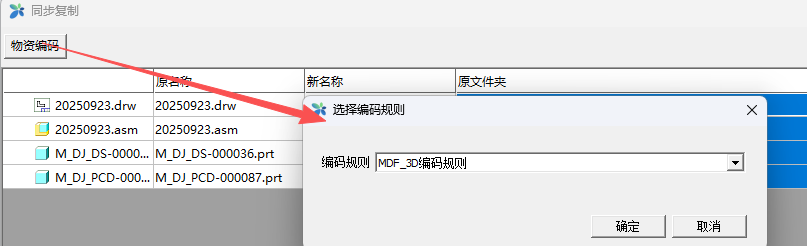
For new file names, quick replacement, adding prefixes and suffixes, or automatically creating new file names based on encoding rules can be used.
Right click menu for file names: Add prefix, Add suffix, Batch replace, Clear
Right click menu of folder column: Batch replace, select new folder, and clear

In addition to replacement, you can also choose encoding rules. Files that match the encoding rules will automatically generate new image numbers
according to the encoding rules, as shown in the following two sets of image examples.

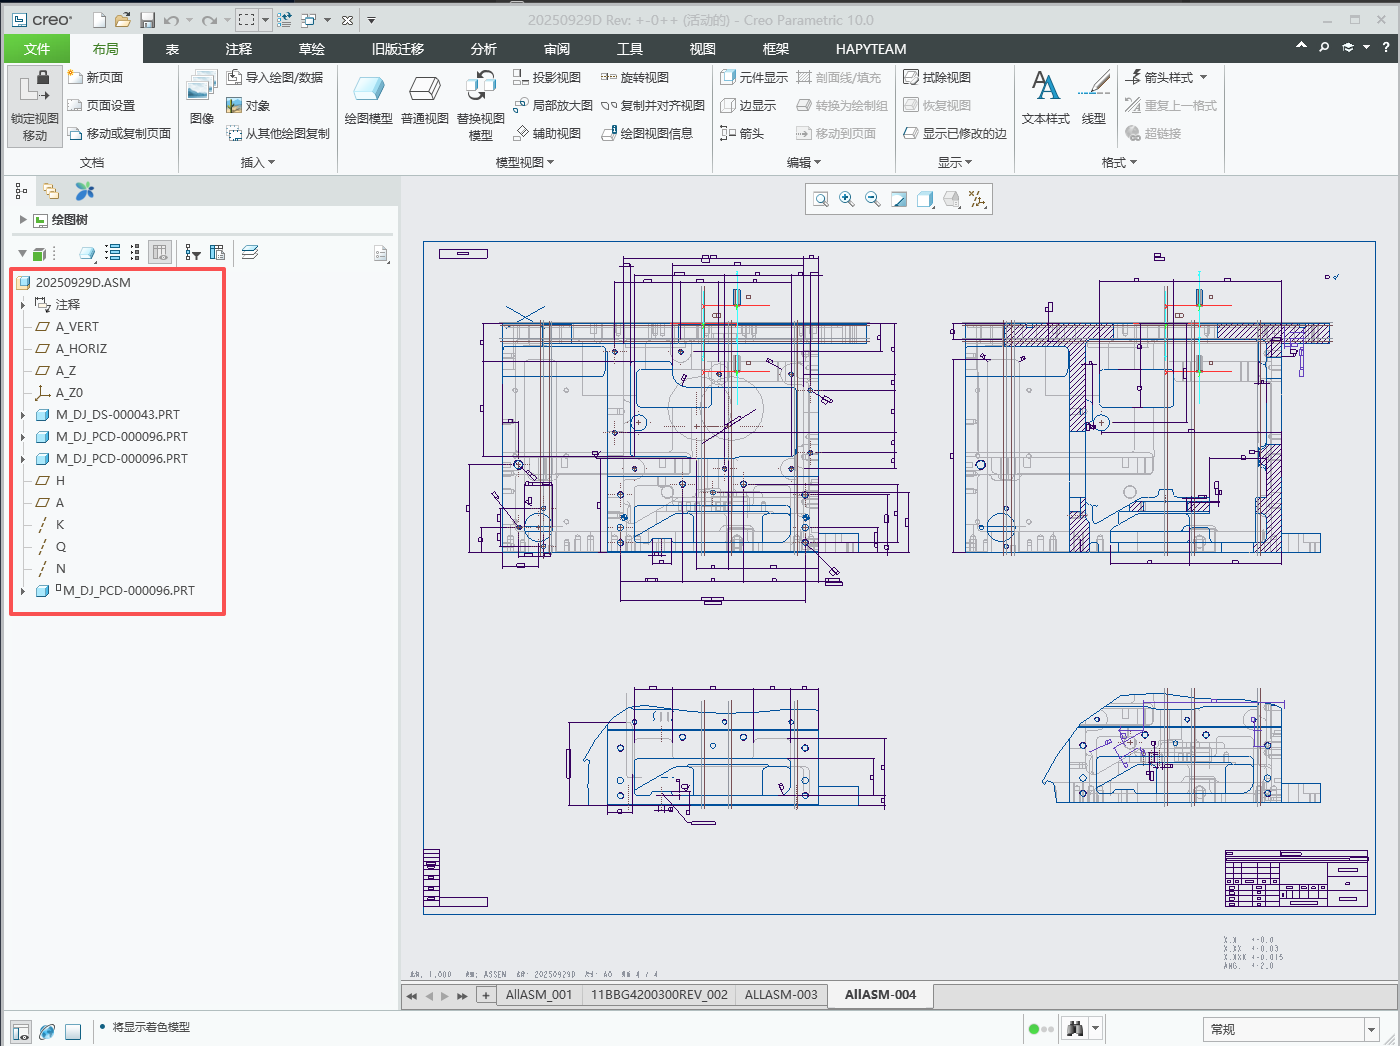
After selecting the folder, the program will automatically copy and modify all file names and their associated relationships, generating a new
directory.

The structure tree of the newly generated drawings and models has been updated with corresponding file names
# 7.HAPYTEAM attribute
In addition to HAPYTEAM related system users, users sometimes need to check the properties of related files into the server for search queries or other users. HAPYTEAM provides a convenient way for users to transform the attributes within a file into HAPYTEAM attributes that can be displayed or queried.
According to the third function in Chapter 6.1: Attribute Table, users can import the relevant CREO file attributes to the server.
# 7.1 Create relevant attribute names with administrator privileges

# 7.2 Unified file attributes
According to the first and second functions of section 6.1, export and import attributes, unify the attribute names of all project files, and then use the fourth and fifth functions of section 6.1, utilize the BOM export and import function, improve the attribute values, and finally check them into the server uniformly. The relevant attributes will be displayed in the file list.
Attributes on the model:

Display user-defined attributes in HAPTYEAM

Search result display

# 8.Signature watermark
When the previewable file of the published file is a PDF with a signature watermark on it, the electronic signature will be automatically signed in the relevant location after browsing.
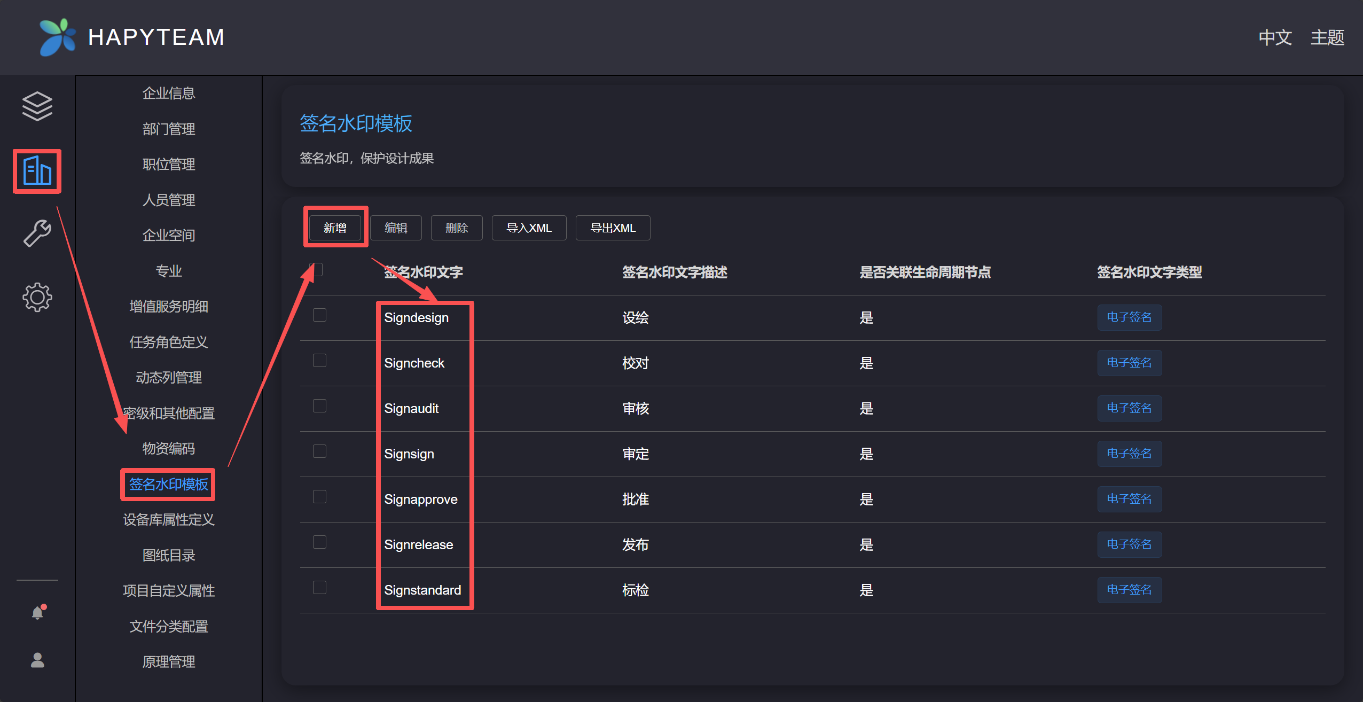
# 8.1 Enterprise Signature Configuration
Log in to the enterprise administrator account and configure the signature watermark template properties in the enterprise
Signature watermark configuration diagram:
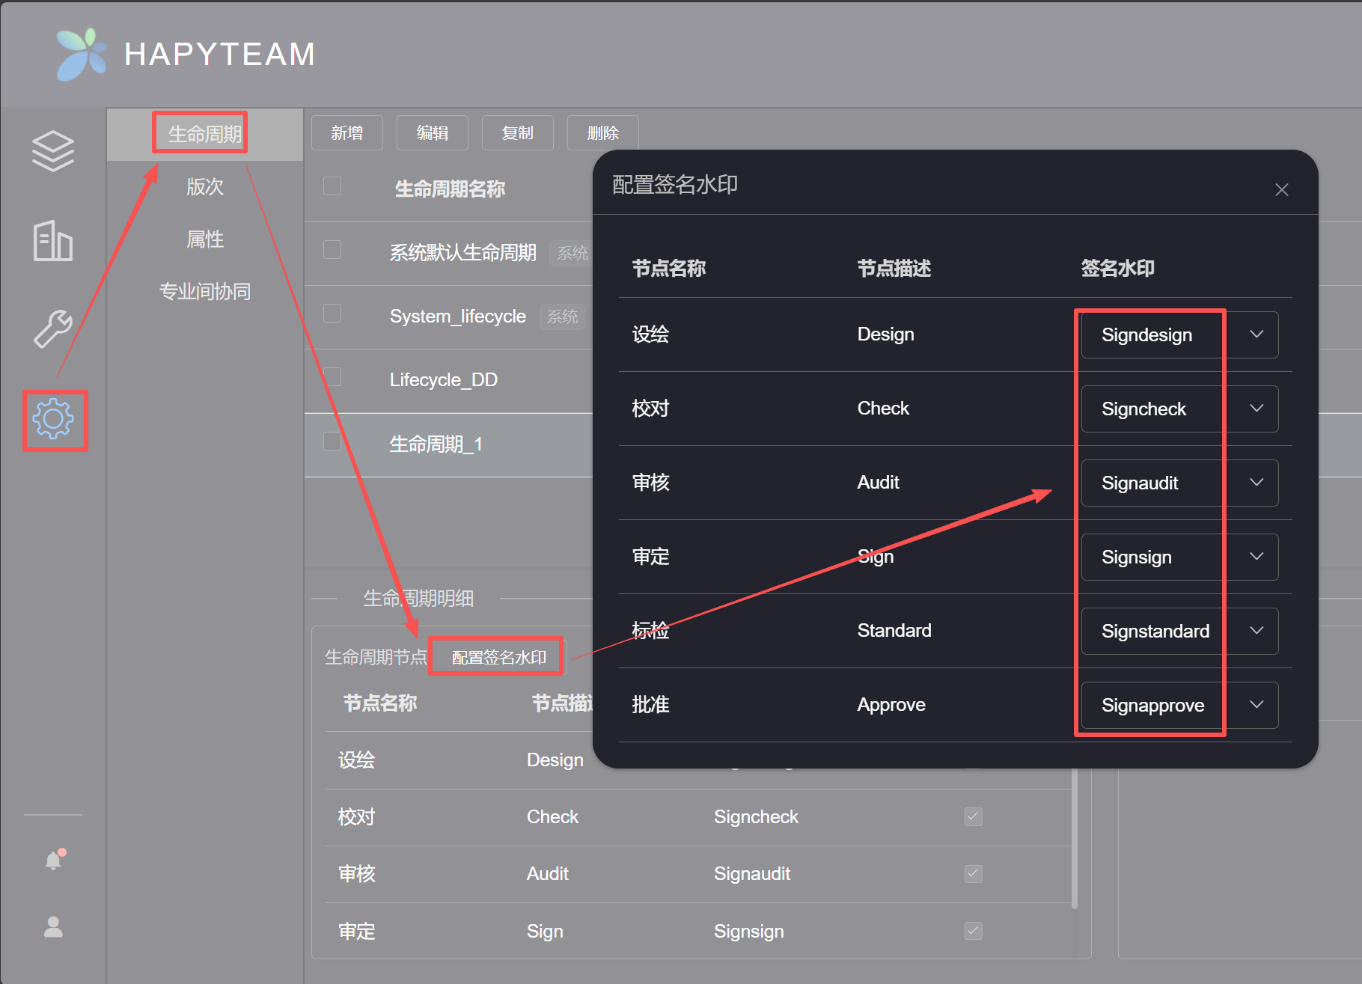
Then, in configuring the lifecycle template, configure the default template with a signature watermark
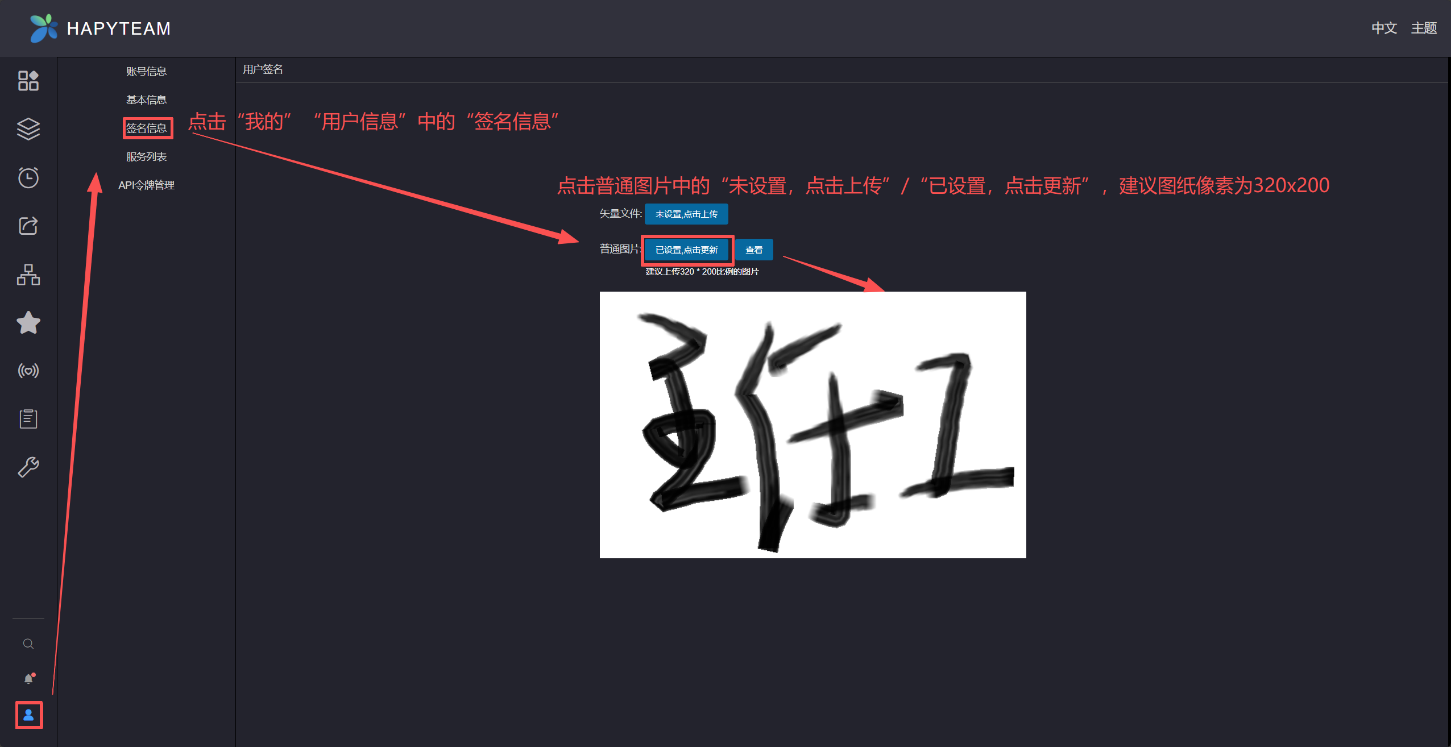
# 8.2 Add a personal signature picture of the water box
In the bottom left corner of the HAPYTEAM webpage under "My" and "User Information", set a personal signature. The recommended pixel size for the
personal signature image is 320x200, and other sizes should strictly follow this aspect ratio. The file format should be transparent with the base
image, such as PNG. The operation steps are shown in the following figure:
# 8.3 Creating Word/Excel Signature Watermarks
Configure watermark files for Word and Excel files: Write signature watermark text in the corresponding cells (corresponding one-to-one to the
signature watermark name configured by the enterprise administrator in the lifecycle template), and set the color of the signature watermark file to white.
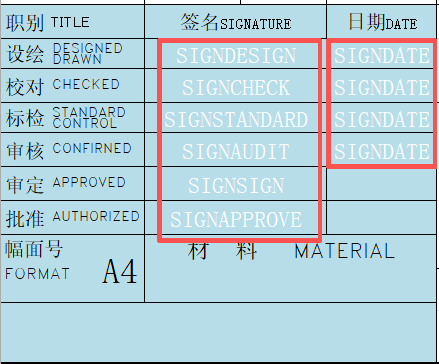
# 8.4 Signature watermark of CREO's engineering drawing files
CREO's engineering drawing files need to define corresponding title bar templates with signed watermarks to configure the corresponding watermark text
in the drawing. When the relevant engineering drawing files are checked in, relevant PDFs will be automatically created for viewing attachments. After
the verification process is completed, the project administrator will click the "Electronic Signature" button, and the PDF file will come with a
signature. CREO Title Block Style with Signature Watermark Text:
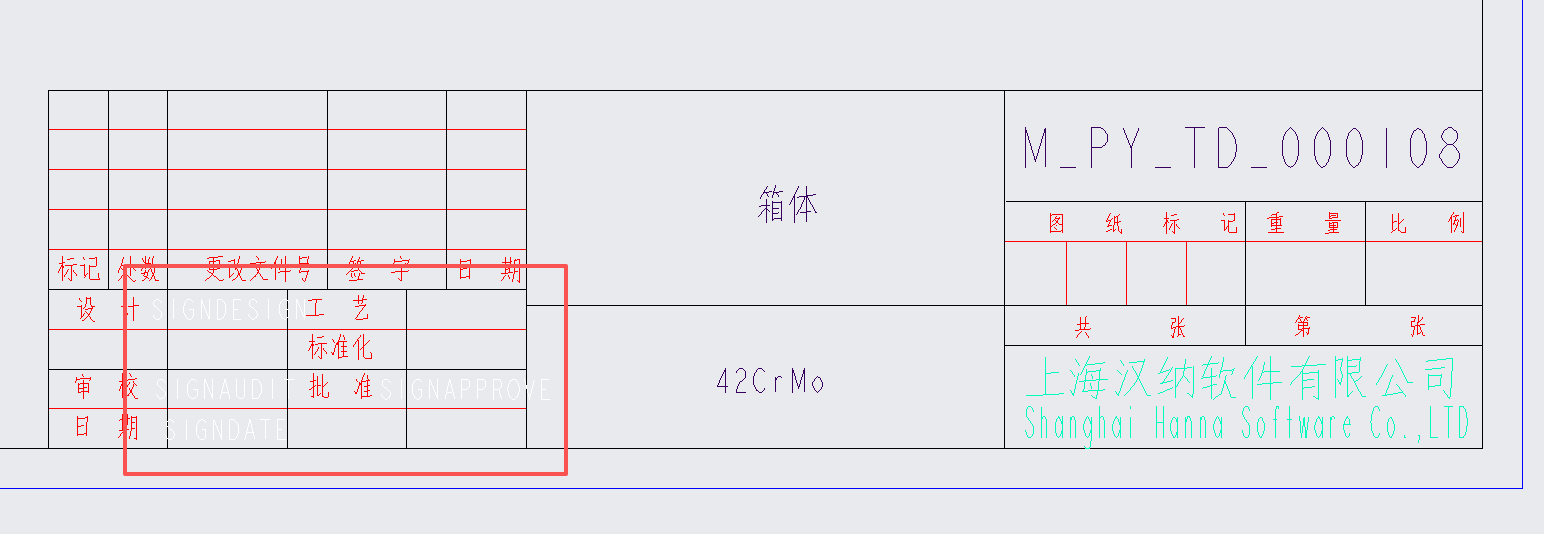
PDF file style without electronic signature after checking into the server:
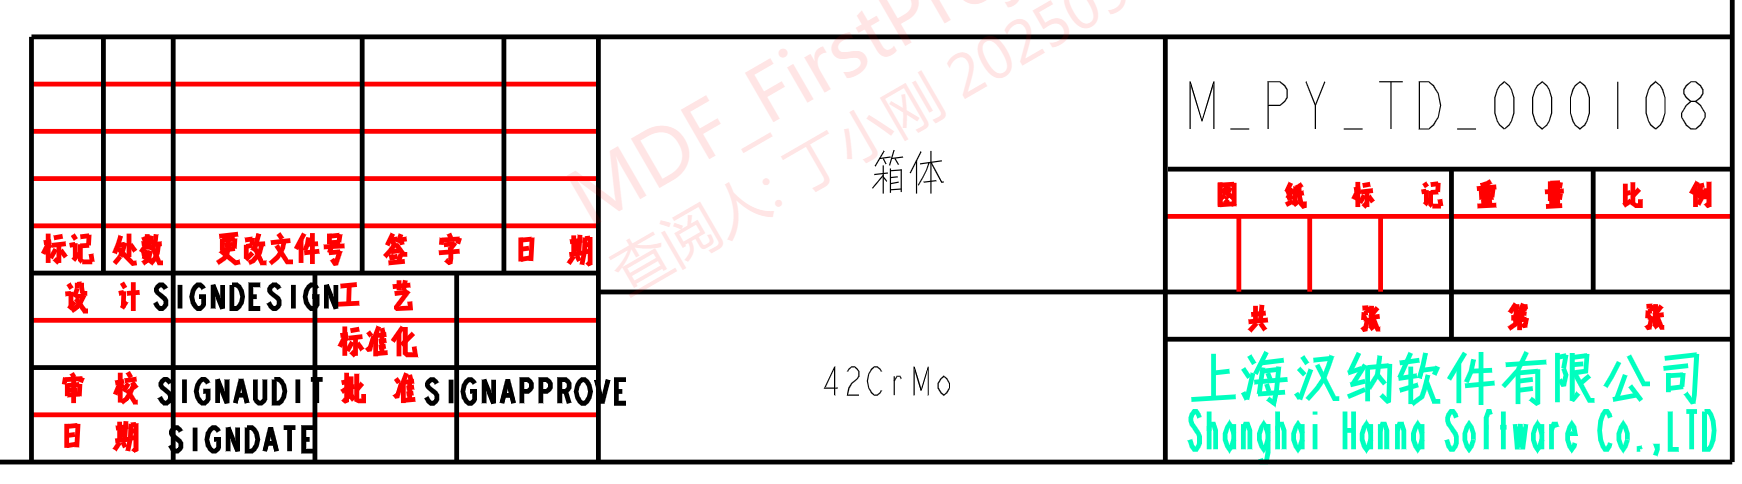
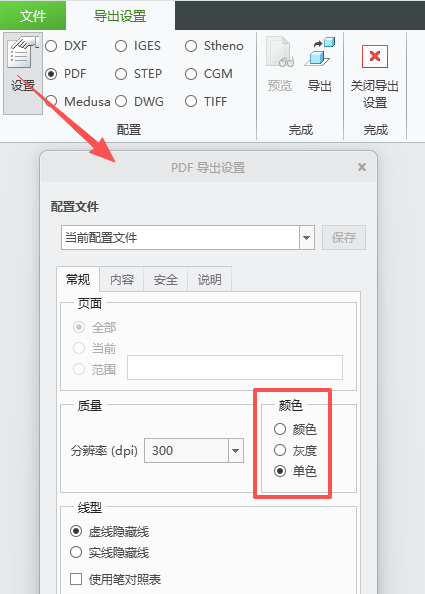
Note: The above exported PDF styles can be selected as monochrome, color, or monochrome by users in the File ->Save as Export ->Settings dialog box.
As shown in the following dialog box: